Updated 16 March 2021
Welcome to the Chimpeon Help. Please take time to read it.
NOTE: Click here to view the help for Chimpeon Legacy.
Chimpeon is a software application that automates almost any game that runs under windows - even Android games in an emulator and games streamed from another computer. It does this by performing actions such as pressing a key when certain conditions are satisfied such as a pixel in the game window being detected. Whether you want to perform a combat rotation in an MMORPG, target an enemy in an FPS, automatically respond to in-game prompts, or simply prevent AFK, Chimpeon is your perfect automation partner.
NOTE: Other than being able to detect pixels within a game, Chimpeon does not know what the game is actually doing (i.e. it does not analyse game code). Therefore, do not expect it to perform actions that a bot dedicated to a particular game is developed to do.
The following table lists general terms that are not described elsewhere in the Chimpeon Help:
| TERM | DESCRIPTION |
|---|---|
| Click | Press the primary mouse button (normally the left button). |
| Check / Checked / Checking | Involves Chimpeon seeing if the Expression associated with a Trigger is satisfied (true). |
| Double click | Press the primary mouse button (normally the left button) twice. |
| Fired | When the Expression associated with a Trigger is satisfied and the associated Action or Actions are performed. |
| FPS | First person shooter, e.g. Warzone and Doom. |
| LMB | Left mouse button. |
| MMORPG | Massively multiplayer online role-playing game, e.g. World of Warcraft and Albion. |
| RMB | Right mouse button. |
| Satisfied | When an Expression or a Condition is true. |
| X-axis | The horizontal plane a pixel is positioned along. |
| Y-axis | The vertical plane a pixel is positioned along. |
In this section, the following information is provided:
Chimpeon has the following system requirements:
Chimpeon can be downloaded using the following url:
To begin the installation process, double-click the Chimpeon setup program (Chimpeon_n_Setup.exe) then follow the on-screen instructions.
During installation you are prompted to specify an installation path and folder. The folder name specified will be the name adopted by the Chimpeon exe, process, Start menu folder and shortcut, desktop shortcut and taskbar name.
If another instance of Chimpeon is already launched during the installation process, a Notification window prompting you to exit is opened. Click the Yes button to exit Chimpeon and continue with installation. This usually occurs when updating Chimpeon.
NOTE: To ensure the setup has not been tampered with and is created and published by Fly Software, "Fly Software Ltd" will appear as the Verified Publisher in the Windows User Account Control window that is opened at the start of installation. Do NOT install Chimpeon unless Fly Software Ltd are the verified publisher.
To launch (run) Chimpeon, click the Chimpeon option in the Chimpeon folder on the Windows Start menu, or double-click the Chimpeon shortcut icon (see Fig. below) on the Windows Desktop.

Fig. Chimpeon shortcut icon
NOTE: The Chimpeon option and Chimpeon folder name on the Windows Start menu and the name of the Chimpeon shortcut icon on the Windows Desktop, will reflect the name of the folder specified during installation.
When Chimpeon is launched, the account used to activate it is checked for a valid licence. If found, this licence is associated with this instance of Chimpeon. If another instance of Chimpeon on the same PC is activated with the same account or is launched when the same account was previously used to activate it, it is associated with the same licence (even if other valid licences are available). As a result, the previous instance of Chimpeon is no longer associated with the licence and the time restriction is enforced. This process continues for all instances of Chimpeon launched on the same PC. This is because these instances of Chimpeon all have the same ID.
To ensure different instances of Chimpeon using the same account on the same PC are associated with different valid licences, each one must be assigned a different ID. To do this, perform the following actions:
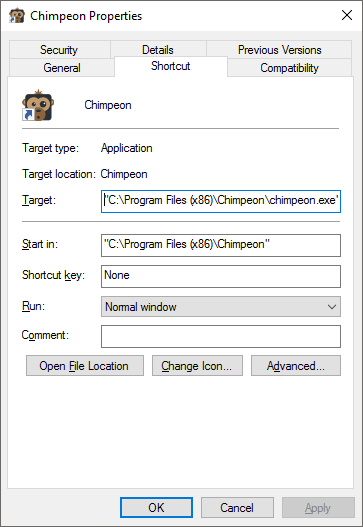
Fig. Chimpeon Properties window (Shortcut tab) (Windows 10)
Repeat the actions above for each instance of Chimpeon that needs to be associated with a different valid licence. Use a different ID (e.g. ChimpeonB) at point 4.
Use the shortcuts created to launch each instance of Chimpeon. Following this, activate each instance.
When an ID is applied, the ID appears in the Title bar of the Main interface and in the About window. This helps to quickly identify instances of Chimpeon.
NOTE: The number of valid licences available in the account used to activate each instance of Chimpeon must match or exceed the number of Chimpeon instances being launched on the same PC.
When applying an ID to the Target, the following rules apply:
NOTE: Invalid characters are removed within Chimpeon.
EXAMPLE: If Chimpeon@Me was applied to the Target, ChimpeonMe would be used as the ID within Chimpeon.
When Chimpeon is launched, the following windows may open:
If a notification is available, the Notification window (see Fig. below) is opened (if the option to do so is enabled) when Chimpeon is launched. Click the OK button to close the Notification window and continue launching. To view further details about the notification, click the Click here link to open the Notifications page on the Chimpeon website in the default browser.
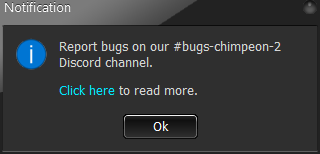
Fig. Notification window
MORE: For further details about enabling and disabling the opening of the Notification window when Chimpeon is launched, refer to Preferences > General Settings > Check For Notification On Launch.
If an update for Chimpeon is available, the Update window (see Fig. below) is opened (if the option to do so is enabled) when Chimpeon is launched.
MORE: For further details about the Update window, refer to Getting Started > Updating.
MORE: For further details about enabling and disabling the opening of the Update window when Chimpeon is launched, refer to Preferences > General Settings > Check For Update On Launch.
If a critical update for Chimpeon is available, the Critical Update window (see Fig. below) is opened when Chimpeon is launched.
MORE: For further details about the Critical Update window, refer to Getting Started > Updating.
During installation or after Chimpeon is launched for the first time, the following files are created:
| NAME | DESCRIPTION | DEFAULT LOCATION |
|---|---|---|
| Chimpeon.exe* | Chimpeon executable file. | C:\Program Files\Chimpeon* |
| Config.dat | Configuration file that stores all the configuration settings. | C:\ProgramData\Chimpeon* |
| App.ini | Application initialisation file that determines the layout of the Main interface (see Fig. below) and various default settings. | C:\ProgramData\Chimpeon* |
| Start.wav | Sound file used as the default sound when Chimpeon is started. | C:\ProgramData\Chimpeon\Sounds* |
| Stop.wav | Sound file used as the default sound when Chimpeon is stopped. | C:\ProgramData\Chimpeon\Sounds* |
*NOTE: The Chimpeon folder name and Chimpeon executable file is determined by the name specified for the installation folder during installation.
The Main interface (see Fig. below) is where Chimpeon is configured, started and stopped.

Fig. Main interface
The Main interface contains the following components:
| ID | NAME | DESCRIPTION |
|---|---|---|
| 1 | Title bar | The title bar contains the Chimpeon logo, the ID of the instance (applied to the Target of the shortcut), Minimise button and Exit button, and allows the Main interface to be moved. To help avoid detection by games and anti-cheat software the title bar does not contain the name "Chimpeon" in a text format. |
| 2 | Show Compact View When Started checkbox | When enabled (ticked), shows the Compact View interface when Chimpeon is started. |
| 3 | Compact View button | Shows the Compact View interface. |
| 4 | Menus | File, Options and Help menus. |
| 5 | Start/Stop Button | Starts and stops Chimpeon. |
| 6 | Start/Stop Hot Key | Determines the key or combination of keys used to start and stop Chimpeon. The default is Ins (Insert). |
| 7 | Start/Stop Sounds | Determines the sound files that are played when Chimpeon is started and stopped. |
| 8 | Profiles panel | Displays Profiles and enables Profiles to be configured and managed. |
| 9 | Triggers panel | Displays the Triggers associated with the selected Profile and enables Triggers to be configured and managed. |
| 10 | Status Hot Keys button | Opens the Status Hot Keys window where Status Hot Keys are configured and managed. |
| 11 | Conditions panel | Displays the Conditions associated with the selected Trigger and enables Conditions to be configured and managed. |
| 12 | Actions panel | Displays the Actions associated with the selected Trigger and enables Actions to be configured and managed. |
| 13 | Log panel | Displays the log messages that are generated when Chimpeon is started. |
The following menus and associated options are provided:
| MENU | OPTION | DESCRIPTION |
|---|---|---|
| File | Reload | Reloads the configuration settings saved in the configuration file. |
| Save | Saves the configuration settings to the configuration file. | |
| Exit | Exits Chimpeon. | |
| Options | Show Hints | When enabled (ticked), shows the hint for a component or setting when the mouse cursor is hovered over it. |
| Stay On Top | When enabled (ticked), forces the Main interface and all Chimpeon windows to stay on top of other application and game windows. | |
| Preferences | Opens the Preferences window where proxy settings can be specified and the Update window and Notification window can be enabled or disabled. | |
| Help | Help Topics | Opens this Help in the default browser. |
| Home | Opens the Chimpeon website in the default browser. | |
| How To Guides | Opens the How To Guides page on the Chimpeon website in the default browser. | |
| Troubleshooting | Opens the Troubleshooting page on the Chimpeon website in the default browser. | |
| Buy Now | Opens the Buy Now section on the Chimpeon website in the default browser. | |
| Update | Opens the Download page on the Chimpeon website in the default browser and automatically begins downloading the latest release. | |
| Activate | Opens the Activate window where an account containing a valid licence can be specified in order to activate Chimpeon and remove the time restriction. | |
| About | Opens the About window. |
The main interface contains panels (see Fig. below) that contain items such as Profiles, Triggers, Conditions and Actions. All panels can be resized and each normally enables items to be selected, added, deleted, duplicated, cut, copied, pasted and moved.
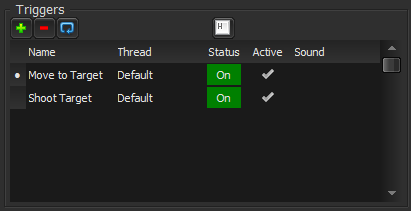
Fig. Panel (Triggers)
Panels can be resized either vertically, horizontally or both.
To resize a panel, perform the following actions:

Fig. Resize Grabber (horizontal)
The Profiles panel, Triggers panel, Conditions panel and Actions panel contain items that will need to be selected when configuring Chimpeon.
To select an item in a panel, click anywhere within its row. Following this, a white dot appears to the left of the selected item to indicate it is selected.
The Profiles panel, Triggers panel, Conditions panel and Actions panel can have items added.
To add an item to a panel, click the Add button ( ).
).
The Profiles panel, Triggers panel, Conditions panel and Actions panel contain items that can be deleted.
To delete an item from a panel, perform the following actions:
 ) to open a Confirm Delete window.
The Profiles panel, Triggers panel, Conditions panel and Actions panel contain items that can be duplicated.
To duplicate an item in a panel, Select the item then click the associated Duplicate button ( ).
).
The Triggers panel, Conditions panel and Actions panel contain items that can be cut (removed) from the panel ready for pasting within the same type of panel.
To cut an item in a panel, Select the item then click the associated Cut button ( ).
).
The Triggers panel, Conditions panel and Actions panel contain items that can be copied ready for pasting within the same type of panel.
To copy an item in a panel, Select the item then click the associated Copy button ( ).
).
Items cut or copied from the Triggers panel, Conditions panel or Actions panel can be pasted within the same type of panel.
EXAMPLE: A Trigger cut or copied from the Triggers panel of Profile A, can be pasted within the Triggers panel of Profile B.
To paste an item that has been cut or copied, click the Paste button ( ) in the panel where the item needs to be pasted within.
The Profiles panel, Triggers panel, Conditions panel and Actions panel contain items that can be moved up and down in the list.
To move an item in a panel, perform the following actions:
To ensure Chimpeon does not obscure the game window, the Compact View interface can be shown instead of the Main interface. As a result, only a Title bar and a Start/Stop button are displayed (see Fig. below).

Fig. Compact View interface
To show the Compact View interface and hide the Main interface, click the Compact View button on the Title bar of the Main interface.
To hide the Compact View interface and show the Main interface, click the Main View button (red circle) on the Compact View Title bar.
When configuration of Chimpeon is complete, it will likely be beneficial to show the Compact View interface automatically when Chimpeon is started - especially if only one monitor is being used. Click the Show Compact View When Started checkbox next to the Compact View button to add and remove a tick. Add a tick to automatically show the Compact View interface when Chimpeon is started. Remove the tick to prevent the Compact View interface being automatically shown when Chimpeon is started.
To force the Main interface and all Chimpeon windows to stay on top of other application and game windows, click the Options menu then click the Stay On Top option to add a tick to it. Remove the tick to prevent the Main interface and all Chimpeon windows staying on top.
Starting and stopping Chimpeon, Triggers being fired and Status Hot Keys being used can all be configured to play a sound. To enable or disable all of these sounds, the Play Sounds setting in the Main interface is provided.
Click the Play Sounds checkbox to enable or disable sound. A tick enables sounds to be played. Blank prevents sounds from being played.
Chimpeon must be started before the tasks associated with the selected Profile are performed.
Click the Start button (see Fig. below) or the Start/Stop Hot Key to start Chimpeon.

Fig. Start button
Click the Stop button (see Fig. below) or the Start/Stop Hot Key to stop Chimpeon.

Fig. Stop button
The following processes also stop Chimpeon:
Chimpeon will also temporarily stop when the menus or certain Chimpeon windows are focused and will start again when they are unfocused.
If Chimpeon does not do anything when started, refer to Troubleshooting.
The Log is used to view the processes being performed while Chimpeon is started.
MORE: For further details about the Log, refer to Log.
To provide a quick and easy mechanism for starting and stopping Chimpeon without the need to click the Start and Stop button, a Start/Stop Hot Key can be specified. When pressed, Chimpeon is started if stopped and stopped if started.
The following configuration settings are associated with the Start/Stop Hot Key:
| NAME | DESCRIPTION | VALUE(S) | DEFAULT |
|---|---|---|---|
| Shift | Determines whether the Shift key must be pressed at the same time as the key specified for the Start/Stop Hot Key setting. | Ticked (selected) Blank (not selected) |
Blank (not selected) |
| Ctrl | Determines whether the Ctrl key must be pressed at the same time as the key specified for the Start/Stop Hot Key setting. | Ticked (selected) Blank (not selected) |
Blank (not selected) |
| Alt | Determines whether the Alt key must be pressed at the same time as the key specified for the Start/Stop Hot Key setting. | Ticked (selected) Blank (not selected) |
Blank (not selected) |
| Start/Stop Hot Key | Determines the key used to start and stop Chimpeon. | Pre-defined key or any key | Ins (Insert) |
The Shift, Ctrl and Alt settings determine whether a corresponding modifier key should be pressed at the same time as the key specified for the Start/Stop Hot Key setting.
Click the Shift, Ctrl or Alt setting checkbox then click it again to add or remove a tick. A tick indicates the associated key must be pressed. Blank indicates the associated key is not used.
The Start/Stop Hot Key setting determines the key used to start and stop Chimpeon.
To specify a key, perform the following actions:
When Chimpeon is started and stopped, default sounds are played (that say Start and Stop). These sounds can be changed as required.
To change the Start or Stop sound, perform the following actions:
 ) to the right of the Start or Stop setting edit box.
The Open window now closes and the path and file name of the selected sound file appears in the Start or Stop setting edit box.
NOTE: The Play Sounds setting must be enabled before sounds are played.
MORE: For details about where the default start and stop sound files are located, refer to Getting Started > Files.
To prevent start and stop sounds being played (without disabling the Play Sounds setting), click inside the Start or Stop setting edit box then delete the existing path and file name (i.e. make the edit box blank).
By default, Chimpeon can only be started for a short period of time until it is automatically stopped. To remove this time restriction the following actions must be performed:
To sign up for an account, use the following url:
To buy one or more licences and automatically add them to the account specified during the purchase process, use the following URL:
If an account containing a valid licence has not been used to activate Chimpeon, a time restriction is enforced.
The time restriction is initially set to approximately 10 minutes and begins to count down when Chimpeon is started. The countdown stops when Chimpeon is stopped and begins again when Chimpeon is started from the point at which it was last stopped.
EXAMPLE: The time restriction is 10 minutes. Chimpeon is started then stopped after 8 minutes. The remaining time restriction is 2 minutes.
When the time restriction countdown reaches 0 Chimpeon is automatically stopped and a Chimpeon Stopped window (see Fig. below) is opened.
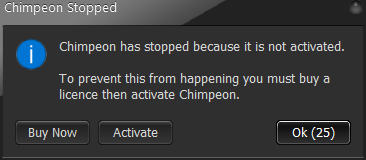
Fig. Chimpeon Stopped window
The OK button in the Chimpeon Stopped window has a 30 second countdown. When the countdown expires, click the OK button to close the Chimpeon Stopped window. Chimpeon can then be started again at which point the time restriction countdown begins again.
To remove the time restriction Chimpeon must be activated. In essence this process associates Chimpeon with a valid licence in a specified account.
To activate Chimpeon, perform the following actions:
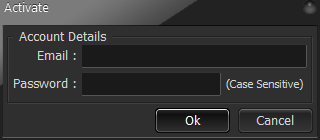
Fig. Activate window
If activation is successful, the Activate window is closed and an Activation Successful window is opened. Click the OK button to close this window.
If activation is unsuccessful, a window is opened describing why activation failed. Click the OK button to close this window and try the activation process again.
Following successful activation and each time Chimpeon is launched after activation, Chimpeon is associated with a valid licence held in the account specified during activation. Chimpeon will try to associate itself with a valid licence using the following priority:
If Chimpeon is forced to associate itself with a valid licence that is associated with another instance of Chimpeon (i.e. there are not enough valid licences in the account for all instances of Chimpeon), this instance of Chimpeon no longer uses the licence and the time restriction is enforced. The time restriction is only removed if this instance of Chimpeon is activated or launched again, at which point the instance of Chimpeon that uses a licence with the oldest activation date, has its licence used and the time restriction enforced.
This association with a valid licence is suitable when multiple instances of Chimpeon will be used independently. However, if multiple instances of Chimpeon need to be used concurrently, a licence for each one must be purchased or instances will continually lose their licence and have the time restriction enforced when other instances are activated or launched.
EXAMPLE If you run three instances of Chimpeon independently then only one licence is required. If you run three instances of Chimpeon concurrently, then three licences are required.
MORE: For details about launching multiple instances of Chimpeon on the same PC, refer to Launching > Multiple Instances on the Same PC.
The number of days a licence associated with Chimpeon remains valid and subsequently how long Chimpeon remains activated, is shown in the About window (see Fig. below) and on the Licences page of the Chimpeon website:
MORE: For further details about the About window, refer to Getting Started > About Chimpeon.
Chimpeon occasionally has new features added and issues fixed. When this occurs, a new version of Chimpeon is released and it is advised the current installation is updated. The update process can be started when Chimpeon is launched or at any time after launch.
If a Chimpeon update is available, an Update window (see Fig. below) is opened (if the option to do so is enabled) when Chimpeon is launched.
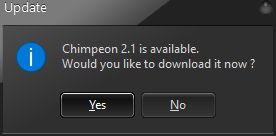
Fig. Update window
To start the update process, click the Yes button. Following this, the Download page on the Chimpeon website is opened in the default browser and the latest version of Chimpeon begins to download. To cancel the update process (which is not recommended), click the No button.
Following download, Chimpeon will need to be installed.
MORE: For further details about enabling and disabling the opening of the Update window when Chimpeon is launched, refer to Preferences > General Settings > Check For Update On Launch.
To see if an update is available any time after launching click the Help menu then click the Update option.
If an update is available the Download page on the Chimpeon website is opened in the default browser and the latest version of Chimpeon begins to download.
If an update is unavailable, an Update unavailable window (see Fig. below) is opened notifying you of this.
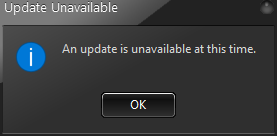
Fig. Update Unavailable window
Alternatively, use the following URL to download the latest version of Chimpeon:
Following download, Chimpeon will need to be installed.
There may be an occasion when Chimpeon requires a critical update. When this occurs, a Critical Update window (see Fig. below) is opened when Chimpeon is launched.

Fig. Critical Update window
The Critical Update window will continue to appear when Chimpeon is launched and Chimpeon cannot be used until the update is performed.
To start the critical update process, click the Download button. Following this, the Download page on the Chimpeon website is opened in the default browser and the latest version of Chimpeon begins to download. To cancel the critical update process and exit Chimpeon, click the Exit button.
Alternatively, use the following URL to download the latest version of Chimpeon:
Following download, Chimpeon will need to be installed.
If the PC/laptop that Chimpeon is installed on uses a proxy server to connect to the Internet, proxy settings must be specified before Chimpeon can be used.
When Chimpeon is first launched on a PC/laptop where a proxy is used, a Connection Error window is opened. This is because Chimpeon cannot connect to the Internet because proxy settings have not yet been specified. To specify proxy settings, click the Proxy Settings button in the Connection Error window. Following this, the Preferences window (see Fig. below) is opened.
The following proxy settings are provided:
| Setting | Description |
|---|---|
| User Name | Determines the user name required to connect to the proxy server. |
| Password | Determines the password required to connect to the proxy server. |
| Server | Determines the name or IP address of the proxy server. |
| Port | Determines the port number of the proxy server. |
When all settings are specified, click the OK button to save the proxy settings and close the Preferences window.
MORE: For details about opening the Preferences window, refer to Preferences
CAUTION: Specifying invalid proxy settings will cause the Chimpeon server to be inaccessible and prevent Chimpeon from being activated.
The Chimpeon version, ID, EULA, copyright information and licence details are viewed in the About window (see Fig. below).
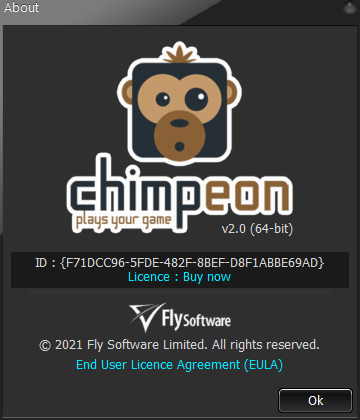
Fig. About window
To open the About window, Click the Help menu then click the About option.
To close the About window, click the Close button.
To exit Chimpeon, click the File menu then click the Exit option. Alternatively, click the Exit button (red circle) on the Title bar.
If configuration settings have changed since the last save, a Confirmation window is opened asking you to confirm whether you want to save them. Click the Yes button to save then exit. Click the No button to not save then exit. Click the Cancel button to not save, close the Configuration window and not exit.
To uninstall Chimpeon, use the Add or Remove Programs feature in Windows.
In this section, the following information is provided:
Configuring Chimpeon is relatively simple and consists of a four-step process:
MORE: If Chimpeon does not interact with a game, refer to Troubleshooting
To successfully configure Chimpeon, it is important to understand the relationship between Profiles, Triggers, Conditions and Actions. The following diagram demonstrates this:
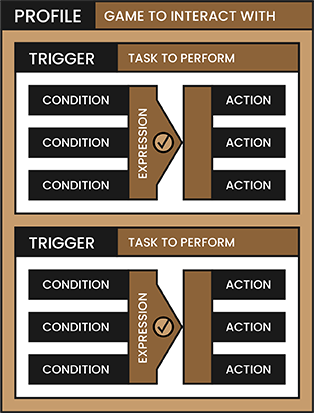
Fig. The relationship between Profiles, Triggers, Conditions and Actions
Configuration settings determine what Chimpeon does and how it interacts with a game when started. Profiles, Triggers, Conditions and Actions have configuration settings that can be manipulated to perform tasks.
Configuration settings for all Profiles and their associated Triggers, Conditions and Actions, are stored in a single configuration file.
MORE: For details about the default location of the configuration file, refer to Getting Started > Files
Configuration settings contained in the configuration file are automatically loaded when Chimpeon is launched.
To reload configuration settings, click the File menu then click the Reload option. Following this, a Confirmation window is opened asking you to confirm the reload. Click the Yes button to reload or the Cancel button to cancel.
CAUTION: When reloading, changes to configuration settings made after the last save are lost.
To save the current configuration settings, click the File menu then click the Save option.
CAUTION: When saving, configuration settings already stored in the configuration file are overwritten.
Configuration strings exported from Chimpeon Legacy cannot be imported into the current version of Chimpeon. This is because the differences between the two are considerable making an import unreliable or impossible. Use the current version of Chimpeon to replicate and improve configurations previously created using Chimpeon Legacy.
In this section, the following information is provided:
A Profile is a container for one or more Triggers. Each Profile determines the game Chimpeon interacts with while started and represents the overall task that Chimpeon performs.
EXAMPLE: If you want to automate a combat rotation for a warrior in an MMORPG then you would add a Profile to accomplish this.
Profiles are displayed and managed in the Profiles panel (see Fig. below).
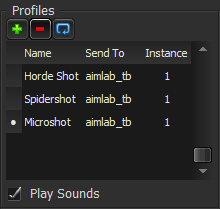
Fig. Profiles panel
The selected Profile determines the Profile used and the game Chimpeon interacts with while started.
NOTE: Multiple Profiles cannot be selected and used while Chimpeon is started.
Each Profile has the following configuration settings:
| NAME | DESCRIPTION | VALUE(S) | DEFAULT |
|---|---|---|---|
| Name | Determines the name of the Profile. | Alphanumeric (100 character maximum) | Profile n (where n is a sequential number) |
| Send To | Determines the game or application Chimpeon interacts with. | All games and applications currently running | Blank |
| Instance | Determines the instance of the game Chimpeon interacts with. | 1 to the total number of instances running | 1 |
Profiles can be selected, added, deleted, duplicated, cut, copied and moved.
MORE: For details about these processes, refer to Getting Started > Interface Overview > Using Panels and Managing Items.
The Name setting of a Profile should normally represent the overall task it performs.
EXAMPLE: If you need to automate a combat rotation for a warrior in an MMORPG you could name the Profile, "Warrior Combat Rotation".
To name a Profile, perform the following actions:
NOTE: There is a 100 character limit for the Name setting.
Each Profile can interact with a single game, and before Chimpeon can be started, a game must be selected.
To select a game (or any application that is running) for a Profile, perform the following actions:
*NOTE: The game must be running for it to appear in the Send To setting list box.
The games listed in the Send To setting list box reflect the main window of each game, and selecting one normally allows Chimpeon to successfully interact with it. However, some games have one or more windows within their main window (see Fig. below) and one of these may need to be selected for the following reasons:
To select a window within the main window of a game, perform the following actions:
Following this, the name of the game appears in the Send To setting list box. If it is the main window of the game it will only be the name of the game that appears. If it is a window within the main window of the game it will be the name of the game followed by a semicolon (;) and a number that appears.
EXAMPLE: If Kill All Monsters is the name of the main window, Kill All Monsters;3 could be a window within the main window.
NOTE: If Chimpeon does not automate a game, selecting a window within the main window of the game is one of the first things to try. Remember, a game can sometimes contain multiple windows, so find, select and try each one.
If multiple instances of the same game (or application) are running, select the required Profile then click the associated Instance speed buttons until the required instance number is shown.
The first game launched is Instance 1. When the same game is launched again it becomes Instance 1 and the first game becomes Instance 2. If the second game is exited, the first game becomes Instance 1.
A Profile (including all of its Triggers, Conditions and Actions) can be imported and exported as a Profile File (.pro).
NOTE: Configuration strings exported from Chimpeon Legacy cannot be imported into the current Chimpeon, and Profile Files exported from the current Chimpeon cannot be imported into Chimpeon Legacy.
Profiles are imported as Profile Files (.pro) which can be obtained from numerous places including the Profiles page on the Chimpeon website:
To import a Profile File, perform the following actions:
 ) in the Profiles panel to open the Import Profile window (see Fig. below).
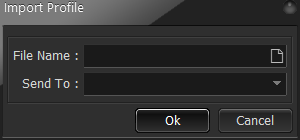
Fig. Import Profile window
If the import is successful a Profile Imported window is opened. Click the OK button to close the Profile Imported window. The Profile that was stored in the Profile File now appears at the bottom of the Profiles panel.
If the import is unsuccessful an Import Failed window is opened. Click the OK button to close the Import Failed window.
*NOTE: If a Send To is selected during the import process, Chimpeon will try to correctly adjust screen-based functionality such as pixel positions and Scan Areas. It does this by using the screen resolution of the game specified for the Send To setting where the export was performed, and the game specified for the Send To setting in the Import Profile window. If a Send To is not selected then screen-based functionality remains unchanged.
NOTE: It is highly likely certain configuration settings contained in an imported Profile will require changing before they work for your game configuration.
A Profile is exported in a Profile File (.pro). From here it can be shared on media such as a web page, Discord and in an email.
To export a Profile File, perform the following actions:
 ) in the Profiles panel to open the Export Profile window (which is a standard Windows File window).
If the export is successful a Profile Exported window is opened. Click the OK button to close the Profile Exported window.
If the export is unsuccessful an Export Unsuccessful window is opened. Click the OK button to close the Export Unsuccessful window.
In this section, the following information is provided:
A Trigger is a container for one or more Conditions and Actions. Normally, a Trigger is added to a Profile for each task Chimpeon needs to perform.
EXAMPLE: If you want to automate a combat rotation in an MMORPG then you would add a Trigger for each spell used in the combat rotation.
When the Expression derived from each Condition associated with a Trigger is satisfied (e.g. a pixel is detected or a timer expires), the Action or Actions associated with the same Trigger are performed (e.g. a key or mouse button is pressed).
Triggers are displayed and managed in the Triggers panel (see Fig. below).

Fig. Triggers panel
Each Trigger has the following configuration settings:
| NAME | DESCRIPTION | VALUE(S) | DEFAULT |
|---|---|---|---|
| Name | Determines the name of the Trigger. | Alphanumeric (100 character maximum) | Trigger n (where n is a sequential number) |
| Thread | Determines the Thread used by the Trigger. | Default User defined |
Default |
| Status | Determines whether a Trigger is on or off. | On Off |
On |
| Active | Determines whether the Trigger is activated or deactivated. | Ticked (activated) Blank (deactivated) |
Ticked (activated) |
| Sound | Determines the sound file that is played when the Expression associated with the Trigger is satisfied (i.e. when the Trigger is fired). | Any WAV file available in the local file system | Blank |
Triggers can be selected, added, deleted, duplicated, cut, copied and moved.
MORE: For details about these processes, refer to Getting Started > Interface Overview > Using Panels and Managing Items.
The order of Triggers in the Triggers panel determines the order they are checked within the same Thread.
EXAMPLE: The following Triggers are listed in the Triggers panel:
Trigger A (Thread 1)
Trigger B (Thread 1)
Trigger C (Thread 2)
Trigger A and Trigger C are checked concurrently and Trigger B is checked after Trigger A.
Move the Triggers up and down in the Triggers panel until the required order is attained.
MORE: For details about randomizing the order Triggers are checked, refer to Threads > Randomizing the Order Triggers are Checked
The Name setting should normally represent the task a Trigger performs.
EXAMPLE: If you need to automate a spell called Fire Lance in an MMORPG you could name the Trigger, "Fire Lance".
To name a Trigger, perform the following actions:
To assign a Thread to a Trigger, perform the following actions:
NOTE: There is always a Thread available called Default and new Threads can be added if required.
MORE: For further details about Threads, refer to Threads.
The Status setting determines whether a Trigger is on or off. On means it will be checked and used while Chimpeon is started. Off means it will not be checked and used while Chimpeon is started.
To enable tasks associated with a Trigger to be checked and used only when required, a Trigger can be turned on and off (and executed just once if the Expression of the associated Condition or Conditions are satisfied) while Chimpeon is started in the following ways:
To specify the on and off status of a Trigger, select the Trigger then click the associated Status setting. If the Status setting shows On it will change to Off. If the Status setting shows Off it will change to On.
The Active setting determines whether the associated Trigger is activated or deactivated. When the Trigger is activated, it is checked and used while Chimpeon is started. When the Trigger is deactivated, it is ignored while Chimpeon is started.
To activate or deactivate a Trigger, click the associated Active setting checkbox then click it again to add or remove a tick. A tick indicates the Trigger is activated. Blank indicates the Trigger is deactivated.
NOTE: If the game specified for the associated Profile's Send To setting is not launched/running, the tick of each Active setting checkbox is red to indicate the associated Triggers are deactivated. Relaunch the game to get going again.
Being able to hear when the Expression of one or more Conditions associated with a Trigger is satisfied (i.e. when the Trigger is fired) can be advantageous - especially when there is a lot of frenetic action going on in a game. A sound file can therefore be applied to each Trigger.
To apply a sound to a Trigger, perform the following actions:
The Open window now closes and the path and file name of the selected sound file appears in the Sound setting edit box.
NOTE: The Play Sounds setting must be enabled before sounds are played.
In this section, the following information is provided:
A Condition is a component of a Trigger and determines a process that Chimpeon performs when started such as detecting a pixel in the game window or waiting for a timer to expire. As Conditions are added to a Trigger, an Expression is created. Each Condition must be satisfied before the Expression is satisfied after which the Action or Actions associated with the same Trigger are performed (i.e. the Trigger is fired).
EXAMPLE: If you want to determine whether a spell in an MMORPG is ready to use, you would add a Condition to accomplish this. If you also want the spell to only be used when an enemy is targeted, you would add another Condition to the same Trigger to accomplish this.
Conditions are displayed and managed in the Conditions panel (see Fig. below).
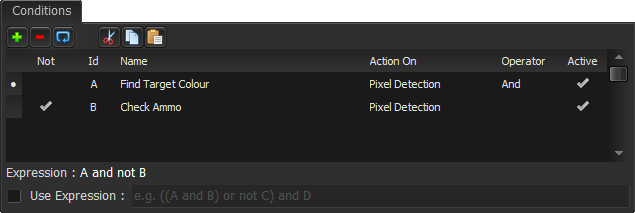
Fig. Conditions panel
Each Condition has the following configuration settings:
| NAME | DESCRIPTION | VALUE(S) | DEFAULT |
|---|---|---|---|
| Not | Determines whether the associated Process setting must be satisfied or not satisfied in order for the Condition to be satisfied. | Ticked (not satisfied) Blank (satisfied) |
Blank (satisfied) |
| ID | A Chimpeon assigned value to identify the Condition in the associated Expression. | A to Z | A to Z |
| Name | Determines the name of the Condition. | Alphanumeric (100 character maximum). Unique to the associated Trigger. | Condition n (where n is a sequential number) |
| Process | Determines what the Condition does. | Always Date/Time Pixel Detection Thread Idle Time Interval Trigger Count |
Always |
| Operator | Determines the operator used by the Condition. Required when more than one Condition is specified for a Trigger. | And Or Xor |
And |
| Active | Determines whether the Condition is activated or deactivated. | Ticked (activated) Blank (deactivated) |
Ticked (activated) |
Conditions can be selected, added, deleted, duplicated, cut, copied and moved.
MORE: For details about these processes, refer to Getting Started > Interface Overview > Using Panels and Managing Items.
The Not setting determines whether the associated Process setting must be satisfied or not satisfied before the Condition is satisfied.
EXAMPLE: If the Condition needed to be satisfied when a pixel in the game window is not found then the Not setting would be enabled (ticked). If the Condition needed to be satisfied when a pixel in the game window is found then the Not setting would be disabled (blank).
Click the Not setting checkbox then click it again to add or remove a tick. A tick indicates the associated Process setting must not be satisfied. Blank indicates the associated Process setting must be satisfied.
The Name setting should normally represent the task a Condition performs.
EXAMPLE: If you need to detect a pixel in a spell icon called Fire Lance you could name the Condition, "Fire Lance icon".
To name a Condition, perform the following actions:
NOTE: The name specified must be unique to the associated Profile (i.e. another Condition within the same Profile must not have the same name).
The Process setting determines what a Condition does and whether the Condition is satisfied or not satisfied as a result of this.
The Process setting has the following options:
| NAME | DESCRIPTION |
|---|---|
| Always | Causes the Condition to always be satisfied. This is the default option. |
| Date/Time | Determines the time and/or date and time when the Condition is satisfied. |
| Pixel Detection | Determines how a pixel is detected, not detected or how it must move in the game window before the Condition is satisfied. |
| Thread Idle | Determines the length of time the Thread used by the associated Trigger should be idle before the Condition is satisfied. |
| Time Interval | Determines the length of time before the Condition is satisfied. |
| Trigger Count | Determines the number of times a specified Trigger must be fired before the Condition is satisfied. |
There may be occasion when you want Chimpeon to perform a task without any logic needing to be satisfied.
EXAMPLE: Manually pressing a Status Hot Key to turn off Triggers associated with single target spells and turn on Triggers associated with multi-target spells.
The Always option of the Process setting causes the Condition to always be satisfied
To configure a Condition so it is always satisfied, click the Process setting list box then click the Always option.
There may be occasion when you want Chimpeon to perform a task at a specific date and/or time.
EXAMPLE: Stop Chimpeon at 17:00 every day.
EXAMPLE: Click a button in the game at 17:00 on a Wednesday.
The Date/Time option of the Process setting determines the date and/or time when the Condition is satisfied.
To specify a date and/or time, perform the following actions:
 ) to the right of the Process setting list box to open the Date/Time window (see Fig. below).
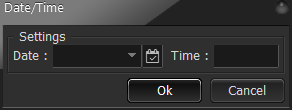
Fig. Date/Time window
To specify a predefined date such as today, tomorrow or a day of the week, click the Date setting list box in the Date/Time window (see Fig. above) then click an option.
To specify a specific calendar date, perform the following actions in the Date/Time window:
 ) in the Date/Time window to open the Calendar pop-up (see Fig. below).
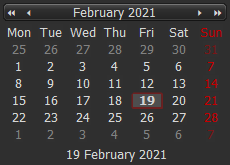
Fig. Calendar pop-up
To specify a time (as hh:mm:ss), perform the following actions in the Date/Time window:
The pixel detection functionality of Chimpeon allows decisions to be made based upon the presence, absence or movement of a pixel in the game window.
EXAMPLE: Detect when an MMORPG spell is ready to use; detect when a health bar in an FPS is almost depleted; detect when a gold resource is full in a strategy game; detect a target in an FPS.
The Pixel Detection option of the Process setting provides access to a wide range of configuration settings and components that determine how a pixel is detected, not detected or how it must move in the game window before the Condition is satisfied.
MORE: For details about how to configure pixel detection, refer to Pixel Detection.
There may be occasion when you want Chimpeon to perform a task when Chimpeon has not performed any other tasks for a specific amount of time.
EXAMPLE: Pressing a key to use a spell when no other spells have been used for several seconds; playing a sound to announce when nothing has been performed in a game for over a minute.
The Thread Idle option of the Process setting determines how long the Thread used by the associated Trigger should be idle before the Condition is satisfied.
Thread Idle works as follows:
NOTE: Triggers in different Threads to the one used by the Trigger associated with the Condition, do not affect the Thread Idle timer.
To specify a thread idle timer for a Condition, perform the following actions:
 ) to the right of the Process setting list box to open the Thread Idle window (see Fig. below).
Fig. Thread Idle window
There may be an occasion when you need Chimpeon to wait for a timer to expire before performing a task.
EXAMPLE: Pressing the jump key to prevent AFK; sending a message to the chat window; clicking an icon to collect resources.
The Time Interval option of the Process setting determines how long it takes before the Condition is satisfied. When the timer expires, and the Condition is satisfied, it begins again and continues until Chimpeon is stopped or the associated Trigger is turned off.
To specify a time interval for a Condition, perform the following actions:
 ) to the right of the Process setting list box to open the Time Interval window (see Fig. below).
Fig. Time Interval window
The Instant setting in the Time Interval window is used to determine whether the Condition is first satisfied immediately when Chimpeon is started or when the timer expires. Click inside the Instant checkbox to add or remove a tick. A tick indicates the Condition is first satisfied immediately when Chimpeon is started. Blank indicates the Condition is first satisfied when the timer expires.
There may be occasion when you only want Chimpeon to perform a task when Chimpeon has performed another task a specific number of times.
EXAMPLE: Use a spell in an MMORPG when another spell has been used three times.
The Process setting's Trigger Count option determines the number of times another Trigger must be fired (i.e. its Expression is satisfied) before the Condition is satisfied.
To specify the number of times another Trigger must be fired before a Condition is satisfied, perform the following actions:
 ) to the right of the Process setting list box to open the Trigger Count window (see Fig. below).
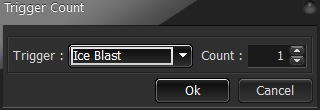
Fig. Trigger Count window
The Operator setting enables Conditions for the same Trigger to be linked with either an And, Or or Xor operator. The order of Conditions in the Conditions panel determines how they are linked and how the associated Expression is created. The top Condition is linked with the Condition below and that Condition is linked with the Condition below that and so on.
EXAMPLE:
Condition A And
Condition B Or
Condition C
Condition A And Condition B Or Condition C
The Operator setting has the following options:
| NAME | DESCRIPTION |
|---|---|
| Blank | Determines that no operator is used. This option is automatically applied for the bottom Condition in the Conditions panel. If this option is selected when connecting two Conditions, it will result in an error being displayed for the associated Expression and the Expression not functioning. |
| And | Satisfied (i.e. true) if the two Conditions it connects are satisfied (i.e. both are true). |
| Or | Satisfied (i.e. true) if one or both Conditions it connects are satisfied (i.e. one or both are true). |
| Xor | Satisfied (i.e. true) when either one but not both of the Conditions it connects are satisfied (i.e. one is true and the other one is false but both are not true). |
To add or modify an operator for a Condition, perform the following actions:
NOTE: The Operator setting for the last (bottom) Condition in the Conditions panel is ignored/disabled until another Condition is added below it or the Condition is moved above another Condition.
The Active setting determines whether the associated Condition is activated or deactivated. When the Condition is activated, it is used while Chimpeon is started. When the Condition is deactivated, it is ignored while Chimpeon is started.
To activate or deactivate a Condition, click the associated Active setting checkbox then click it again to add or remove a tick. A tick indicates the Condition is activated. Blank indicates the Condition is deactivated.
An Expression is automatically created and displayed below the Conditions panel to demonstrate the logic of all the Conditions associated with the selected Trigger.
EXAMPLE: A and B or not C
The letters (A, B, C, etc) that appear in an Expression represent the ID of each Condition.
All Conditions represented in an Expression must be satisfied (i.e. all must return true) before the Action or Actions associated with the same Trigger are performed.
If the Expression that is automatically created is unsuitable or a more complex Expression is required, an Expression can be created manually.
EXAMPLE: ((A and B) or not C) and D
Perform the following actions to create an Expression manually:
To use the Expression that is created automatically, click the Use Expression checkbox to remove the tick.
When specifying an Expression manually, the following components can be used:
In this section, the following information is provided:
An Action is a component of a Trigger and each one determines what Chimpeon does when the Expression derived from the Condition or Conditions associated with the same Trigger is satisfied.
EXAMPLE: If you want to press a key to use a spell in an MMORPG, you would add an Action to accomplish this.
Actions are displayed and managed in the Actions panel (see Fig. below).
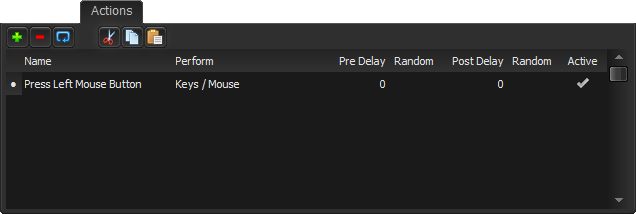
Fig. Actions panel
Each Action has the following configuration settings:
| NAME | DESCRIPTION | VALUE(S) | DEFAULT |
|---|---|---|---|
| Name | Determines the name of the Action. | Alphanumeric (100 character maximum) | Blank |
| Perform | Determines what the Action does. | Keys/Mouse Macro Nothing Play Sound Reset Thread Stop Text String [Status Hot Key name] [Trigger name] Off [Trigger name] [Trigger name] On |
Keys/Mouse |
| Pre Delay | Determines the number of milliseconds the Thread of the associated Trigger is delayed before the Action is performed. | n milliseconds | 0 |
| Random (Pre Delay) | Determines how many milliseconds either side of the Pre Delay setting value a random pre delay is derived from. | 0 to 10000 milliseconds | 0 (not random) |
| Post Delay | Determines the number of milliseconds the Thread of the associated Trigger is delayed after the Action is performed. | n milliseconds | 0 |
| Random (Post Delay) | Determines how many milliseconds either side of the Post Delay setting value a random post delay is derived from. | 0 to 10000 milliseconds | 0 (not random) |
| Active | Determines whether the Action is activated or deactivated. | Ticked (activated) Blank (deactivated) |
Ticked (activated) |
Actions can be selected, added, deleted, duplicated, cut, copied and moved.
MORE: For details about these processes, refer to Getting Started > Interface Overview > Using Panels and Managing Items.
The Name setting should normally represent the task an Action performs.
EXAMPLE: If the Action presses the 1 key you could name the Action, "Press 1 Key".
To name an Action, perform the following actions:
NOTE: The name specified must be unique to the associated Trigger (i.e. another Action within the same Trigger must not have the same name).
The Perform setting determines what an Action does when the Expression derived from the Condition or Conditions associated with the same Trigger is satisfied.
The Perform setting has the following options:
| NAME | DESCRIPTION |
|---|---|
| Keys/Mouse | Presses the specified key(s) and/or performs specified mouse actions. |
| Macro | Performs a sequence of previously recorded key presses and/or mouse actions. |
| Nothing | Does nothing. |
| Play Sound | Plays a specified sound file. |
| Reset Thread Loop | Resets the Thread loop used by the associated Trigger. |
| Stop | Stops Chimpeon. |
| Text String | Sends a specified text string to the game. |
| [Status Hot Key name] | Uses the named Status Hot Key. |
| [Trigger name] On | Turns on the named Trigger. |
| [Trigger name] Off | Turns off the named Trigger. |
| [Trigger name] Execute | Executes the named Trigger. |
Pressing keys and performing mouse actions in a game is one of the core features of Chimpeon.
EXAMPLE: Press the key associated with a MMORPG spell; move the mouse to a specific position in the game window and perform a left click.
The Key/Mouse option of the Perform setting presses one or more keys and/or performs a mouse action.
MORE: For details about how to configure Chimpeon to press keys and perform mouse actions, refer to Keys and Mouse.
The Macro option of the Perform setting plays a sequence of previously recorded key presses and/or mouse actions.
EXAMPLE: A sequence of crafting actions in an MMORPG; an attack combo in an FPS.
MORE: For details about how to configure Chimpeon to record a sequence of key presses and/or mouse actions, refer to Macro.
The Nothing option of the Perform setting causes nothing to be performed.
EXAMPLE: Use when you want to "pause" the associated Thread (by specifying the associated Pre Delay or Post Delay).
To configure an Action to do nothing, click the Perform setting list box then click the Nothing option.
The Play Sound option of the Perform setting plays a specified sound file.
EXAMPLE: Play a sound to indicate a spell has been used.
To specify a sound for an Action to play, perform the following actions:
 ) to the right of the Perform setting list box to open the Play Sound window (see Fig. below).
 ) to the right of the File Name edit box to open the Open window.
Fig. Play Sound window
The Reset Thread Loop option of the Perform setting resets the Thread loop used by the associated Trigger. This means the checking of Triggers in the Thread starts again at the topmost Trigger in the Triggers panel.
EXAMPLE: Perform a priority combat rotation where the Triggers associated with the highest priority spells are assigned to the same Thread and positioned in priority order (top down) in the Triggers panel.
To configure an Action to reset the associated Thread loop, click the Perform setting list box then click the Reset Thread option.
The Stop option of an Action's Perform setting stops Chimpeon.
EXAMPLE: Limit the time Chimpeon automates a game for.
HINT: Combine the Stop option with the Date/Time option or the Time Interval option of the associated Condition's Process setting.
To configure an Action to stop Chimpeon, click the Perform setting list box of the Action then click the Stop option.
The Text String option of the Perform setting sends a specified text string to the game (or application).
EXAMPLE: Automatically send messages to a game's chat system to promote a guild or advertise loot or currency for sale.
HINT: Combine the Text String option with the Date/Time option or the Time Interval option of the associated Condition's Process setting.
To specify a text string for an Action to send to the game, perform the following actions:
 ) to the right of the Perform setting list box to open the Text String window (see Fig. below).
Fig. Text String window
MORE: For details about specifying Sending Options, refer to Keys and Mouse > Specifying How a Key or Mouse Action is Sent to a Game, and Keys and Mouse > Specifying How Long a Key Press or Mouse Action is Performed For.
The [Status Hot Key name] option of an Action's Perform setting uses the named Status Hot Key to turn on, turn off and/or execute one or more Triggers.
To specify a Status Hot Key for an Action to use, click the Perform setting list box then click the [Status Hot Key name] option.
NOTE: When needing to turn on, turn off or execute a single Trigger, it may be preferable to use either the [Trigger name] On, [Trigger name] Off or [Trigger name] option for the Perform setting.
MORE: For further details about Status Hot Keys, refer to Status Hot Keys
For each Trigger in the Profile, the following options appear in the Perform setting list box:
| OPTION | DESCRIPTION |
|---|---|
| [Trigger name] On | Sets the Status setting of the associated Trigger to On. |
| [Trigger name] Off | Sets the Status setting of the associated Trigger to Off. |
| [Trigger name] | Checks to see if the Expression of the associated Trigger is satisfied and if so performs the associated Action(s) just once (i.e. the Trigger is fired). |
To specify a Trigger for an Action to turn on, turn off or execute, click the Perform setting list box then click the associated [Trigger name] On, [Trigger name] Off or [Trigger name] option.
NOTE: When multiple Triggers need to turned on, turned off or executed, instead of using multiple Actions, it may be preferable to use the [Status Hot Key name] option for the Perform setting.
Each Action has a Pre Delay and a Post Delay setting and associated Random settings all of which delay the Thread the associated Trigger is assigned to.
NOTE: Other Threads are not affected by the delay.
The Pre Delay setting determines the number of milliseconds the Thread of the associated Trigger is delayed for before the Action is performed.
EXAMPLE: Specify a pre delay to prevent a mouse being instantly pressed when the associated Expression is satisfied.
To specify a pre delay for an Action, perform the following actions:
The Post Delay setting determines the number of milliseconds the Thread of the associated Trigger is delayed for after the Action is performed.
EXAMPLE: Specify a post delay after a fishing bobber in an MMORPG is cast so it has time to "settle".
To specify a post delay for an Action, perform the following actions:
If Actions are continually performed at the same time, game developers may be able to determine Chimpeon is being used. Therefore, introducing a random element to their use will make in-game actions more human-like and less detectable.
The Pre Delay setting and the Post Delay setting both have an associated Random setting. Each determines the number of milliseconds either side of the associated delay setting value a random delay is derived from.
EXAMPLE: If the Random setting value is 2000 milliseconds and the associated delay setting is 10000 milliseconds, the random delay is any value between 8000 and 12000 milliseconds.
NOTE: Specifying 0 as the value for a Random setting means the associated delay is not random.
To make a delay random (or not random if 0 is specified), perform the following actions:
The Active setting determines whether the associated Action is activated or deactivated. When the Action is activated, it is used while Chimpeon is started. When the Action is deactivated, it is ignored while Chimpeon is started.
To activate or deactivate an Action, click the associated Active setting checkbox then click it again to add or remove a tick. A tick indicates the Action is activated. Blank indicates the Action is deactivated.
In this section, the following information is provided:
A Thread is an independent component of the Chimpeon process and each Trigger must be assigned to one using the Thread setting. When Chimpeon is started, each Thread is executed independently and concurrently allowing performance to be faster than if a single process without Threads was used (like Chimpeon Legacy).*
*NOTE Although the use of Threads normally improves the performance of Chimpeon, it can, under certain circumstances, be detrimental to performance. It is therefore advised you monitor performance when using multiple Threads and adjust their use as required.
There is always a Thread called Default available for the Thread setting but other Threads can be added if required.
Threads are displayed and managed in the Threads window (see Fig. below) which is opened by clicking the Thread setting then clicking the Settings button ( ).
).
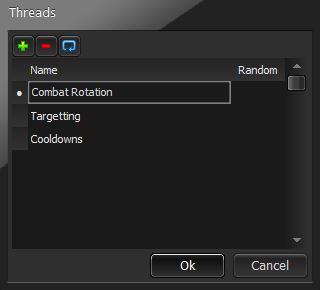
Fig. Threads window
Each Thread has the following configuration settings:
| NAME | DESCRIPTION | VALUE(S) | DEFAULT |
|---|---|---|---|
| Name | Determines the name of the Thread. | Alphanumeric (100 character maximum) | Thread n (where n is a sequential number) |
| Random | Determines whether the Triggers that use the Thread are checked randomly or in the order they appear in the Triggers panel (top to bottom). | Ticked (random) Blank (order in panel) |
Blank (order in panel) |
Threads can be selected, added and deleted.
MORE: For details about these processes, refer to Getting Started > Interface Overview > Using Panels and Managing Items.
The purpose of a Thread is to act as an independent component for one or more Triggers. It is therefore advised the Name setting relates to what the Trigger(s) that use the Thread are configured to do.
EXAMPLE: For Triggers that automate the cooldowns of a combat rotation in an MMORPG, the Thread they are assigned to could be named "Cooldowns".
To name a Thread, perform the following actions in the Threads window (see Fig. above):
By default, the order of Triggers in the Triggers panel determines the order they are checked within the same Thread. To help prevent game developers detecting the use of Chimpeon, the order Triggers are checked within their associated Thread, and as a result, what task the Trigger performs, can be randomized.
To randomize the order Triggers are checked within the same Thread, click the associated Random setting checkbox in the Threads window then click it again to add a tick.
MORE: For further details about determining the order Triggers are checked, refer to Triggers > Managing > Determining the Order Triggers are Checked.
In this section, the following information is provided:
The pixel detection functionality of Chimpeon is used when a task must be performed as a result of an object a pixel is part of being present, not being present or moving within the game window.
EXAMPLE: Detecting a pixel in a spell icon that is ready to be used; detecting the absence of a pixel in an enemy portrait so an enemy can be targeted; detecting a pixel in a fishing bobber that has just moved to indicate a fish has been hooked.
When configured, Chimpeon looks for a pixel, or more specifically, its colour, in a fixed or variable position within the game window. When the pixel is detected, not detected or when it moves in a particular way, the associated Condition is satisfied.
Configuring pixel detection is a five or six stage process:
All the above processes are completed in the Pixel Detection window (see Fig. below) which is opened by performing the following actions:
 ) to the right of the Process setting list box.
![]()
Fig. Pixel Detection window
NOTE: Although it is actually the colour of a pixel Chimpeon looks for in the game window, the term "pixel" instead of "pixel colour" is generally used throughout this section.
The Pixel Detection window (see Fig. above) is split into the following four panels each of which contain related configuration settings and components:
In addition, the following configuration setting appears at the bottom of the Pixel Detection window.
| NAME | DESCRIPTION | VALUE(S) | DEFAULT |
|---|---|---|---|
| Not | Determines whether the associated Condition is satisfied if the pixel to look for is not detected or detected. | Ticked (not detected) Blank (detected) |
Blank (detected) |
The Game panel of the Pixel Detection window has the following configuration settings and components:
| NAME | DESCRIPTION | VALUE(S) | DEFAULT |
|---|---|---|---|
| Live X | Determines the x-axis position of where the centre of Live is located in the game window. | 0 to maximum horizontal game window size in pixels | 0 |
| Live Y | Determines the y-axis position of where the centre of Live is located in the game window. | 0 to maximum vertical game window size in pixels | 0 |
| Live | A live view of the game window centred at the Live X and Live Y setting values. | n/a | Blank |
| Hits p/s | Displays how many times per second the pixel to look for is detected or not detected (if the Not setting is enabled) in the position determined by the Position X and Position Y settings or within the Scan Area. | n/a | n/a |
Take Snapshot  |
Takes a copy of Live that appears in Snapshot. Shift-S also does this. | n/a | n/a |
| Snapshot | A static copy of Live at the point when the Snapshot was taken. Used to determine the position of the fixed pixel to look for, the Single Colour, the left and right extremities of the Colour Range, the List Colour and the top left and bottom right corners of the Scan Area. | n/a | Blank |
| Zoom | Determines the magnification of Snapshot. Increase and decrease magnification using the mouse wheel when the cursor is over Snapshot. | 100% to 1,600% | 100% |
The Position panel of the Pixel Detection window has the following configuration settings and components:
| NAME | DESCRIPTION | VALUE(S) | DEFAULT |
|---|---|---|---|
| Position | Determines whether the pixel to look for is located in a fixed position, a variable position or at the current cursor position. | Fixed Variable Real-time |
Fixed |
| Fixed X | Determines the fixed x-axis position within the game window of the pixel to look for. | 0 to maximum horizontal game window size in pixels | 0 |
| Fixed Y | Determines the fixed y-axis position within the game window of the pixel to look for. | 0 to maximum vertical game window size in pixels | 0 |
| Top | Determines the top (left) corner position of the Scan Area in the game window. | 0 to maximum vertical game window size in pixels | 0 |
| Left | Determines the (top) left corner position of the Scan Area in the game window. | 0 to maximum horizontal game window size in pixels | 0 |
| Bottom | Determines the bottom (right) corner position of the Scan Area in the game window. | 0 to maximum vertical game window size in pixels | 0 |
| Right | Determines the (bottom) right corner position of the Scan Area in the game window. | 0 to maximum horizontal game window size in pixels | 0 |
| Direction | Determines the direction in which the Scan Area is scanned. | Bottom Left to Top Right Bottom Right to Top Left Bottom to Top Center to Outside Left to Right Outside to Center Right to Left Top Left to Bottom Right Top Right to Bottom Left Top to Bottom |
Top Left to Bottom Right |
| Restart When Pixel Detected | Determines whether the scan restarts at the beginning or continues to the end of the Scan Area when the pixel to look for is detected. | Restart (ticked) Continue (blank) |
Restart (ticked) |
| Show Border | Determines whether the Scan Area border is shown or hidden. | Shown (ticked) Hidden (blank) |
Shown (ticked) |
| Colour | Indicates the colour of the Scan Area border and opens the Colour window where a colour can be selected or specified. | Any colour | Red (R256 G0 B0) |
The Colour panel of the Pixel Detection window has the following configuration settings and components:
| NAME | DESCRIPTION | VALUE(S) | DEFAULT |
|---|---|---|---|
| Colour | Determines whether the Single Colour or the Colour Range is used when looking for a pixel. | Range Single |
Single |
Reset  |
Resets the Single Colour or the left and right extremities of the Colour Range to the pixel(s) selected in Snapshot or black (R0 G0 B0) if a pixel is not selected or a Snapshot has not been taken. | n/a | n/a |
| Single Colour | The colour of the Single Colour determined by the Single Colour pixel selected in Snapshot or, if selected, the Colour List. The colour block is a button that opens the Colour window where a colour can be selected or specified. |
Any colour | Black (R0 G0 B0) |
| Left Extremity Colour | The colour of the left extremity of the Colour Range determined by the left extremity pixel selected in Snapshot or, if selected, the lowest RGB value in the Colour List. The colour block is a button that opens the Colour window where a colour can be selected or specified. |
Any colour | Black (R0 G0 B0) |
| Right Extremity Colour | The colour of the right extremity of the Colour Range determined by the right extremity pixel selected in Snapshot or, if selected, the highest RGB value in the Colour List. The colour block is a button that opens the Colour window where a colour can be selected or specified. |
Any colour | Black (R0 G0 B0) |
| Colour Range | The Colour Range determined by the left and right extremity colours or, if selected, the lowest and highest RGB value in the Colour List. | All colours between and including the left and right extremity colours | Black (R0 G0 B0) |
| Use Colour List | Determines whether the Colour List is used to determine the Single Colour or the Colour Range. | Used (ticked) Not used (blank) |
Not used (blank) |
| Add List Colour (+) | Adds the List Colour to the Colour List. | n/a | n/a |
| Delete Colour (-) | Deletes the selected colour from the Colour List. | n/a | n/a |
| Clear Colour List (x) | Clears all the colours from the Colour List. | n/a | n/a |
| List Colour | The colour of the List Colour determined by the by the List Colour pixel selected in Snapshot. The colour block is a button that opens the Colour window where a colour can be selected or specified. |
Any colour | Black (R0 G0 B0) |
| Live | Determines whether the List Colour is obtained from the live game window at the position of the List Colour pixel selected in Snapshot or from the List Colour pixel in Snapshot. | Ticked (live game window) Blank (Snapshot) |
Blank (Snapshot) |
| Auto Add | Determines whether the List Colour is added automatically to the Colour List if the List Colour does not already appear in the Colour List. | Ticked (Yes) Blank (No) |
Blank (No) |
| - Buffer | Determines how much the RGB values of the left extremity of the Colour Range are reduced in order to increase the variation of the Colour Range. | 0 to 255 | 5 |
| + Buffer | Determines how much the RGB values of the right extremity of the Colour Range are increased in order to increase the variation of the Colour Range. | 0 to 255 | 5 |
The Motion panel of the Pixel Detection window has the following configuration settings and components:
| NAME | DESCRIPTION | VALUE(S) | DEFAULT |
|---|---|---|---|
| Use Motion | Determines whether the motion settings are enabled and used, or disabled and not used. | Ticked (enabled) Blank (disabled) |
Blank (disabled) |
| Up | Determines how many pixels up the pixel to look for must move before it is considered detected. | 0 to maximum vertical game window size in pixels | 0 |
| Down | Determines how many pixels down the pixel to look for must move before it is considered detected. | 0 to maximum vertical game window size in pixels | 0 |
| Left | Determines how many pixels left the pixel to look for must move before it is considered detected. | 0 to maximum horizontal game window size in pixels | 0 |
| Right | Determines how many pixels right the pixel to look for must move before it is considered detected. | 0 to maximum horizontal game window size in pixels | 0 |
Before pixel detection can be configured, an area of the game window must be specified. This is displayed in a 114x114 pixel area of the Pixel Detection window called Live (see Fig. below). It is used to determine what appears in Snapshot and normally encompasses one or more of the following:

Fig. Example of Live
The centre point of what appears in Live can be specified in the following ways:
NOTE: If the incorrect game window has been selected for the associated Profile's Send To setting, specifying Live will not work properly. Instead, Live will only be able to show a live image of what is contained within the selected window. To resolve this, the correct game window will need to be found and selected for the Send To setting.
NOTE: If the game specified for the associated Profile's Send To setting is not running, "Send To Not Found" appears in Live. Run the game to remove this notification.
MORE: For details about how the border of Live indicates whether the pixel to look for is detected or not detected (if the Not setting is selected), refer to Pixel Detection > Monitoring Detection
To use the game window to specify the centre of Live, perform the following actions:
Following this, the Live X and Live Y settings indicate the centre of Live.
To use the Live X and Live Y settings to specify the centre of Live, perform the following actions:
Alternatively, click the speed buttons of the Live X or Live Y settings to increase or decrease the associated values. The mouse wheel can also be moved up and down to increase or decrease a value after clicking inside the associated edit box.
NOTE: Only values that fall within the constraints of the game window can be specified for the Live X and Live Y settings. If the values are smaller or greater than these constraints then either the permitted minimum or maximum value is applied after taking focus away from the associated edit box.
Snapshot (see Fig. below) is a static copy of Live at the point when the Snapshot was taken. It is used to select one or more of the following:
Snapshot can also be used to specify the top left and bottom right corners of the Scan Area although these are normally specified directly in the game window.

Fig. Example of Snapshot
To copy Live to Snapshot, click the Take Snapshot button ( ) or press Shift-S.
NOTE: The image within Snapshot is saved with the configuration file so it can be used at any time.
The Position setting determines how the pixel to look for is in positioned within the game window, and enables the settings associated with the chosen option.
The Position setting has the following options:
| NAME | DESCRIPTION |
|---|---|
| Fixed | Indicates the pixel to look for is in a fixed position within the game window and enables the Fixed X and Fixed Y settings. This is the default option. |
| Variable | Indicates the pixel to look for is in a variable position within the game window and enables the Scan Area and Motion settings. |
| Real-time | Indicates the pixel to look for is at the current cursor position. |
A fixed position means the position of the pixel to look for remains constant within the game window.
EXAMPLE: A pixel in an MMORPG spell icon; a pixel in a notification button.
To indicate a fixed position and to enable the Fixed X and Fixed Y settings, click the Position setting list box then click the Fixed option.
MORE: For details about specifying the position of the fixed pixel to look for, refer to Pixel Detection > Specifying the Position of a Fixed Pixel.
A variable position means the position of the pixel to look for does not remain constant within the game window.
EXAMPLE: A pixel in an MMORPG fishing bobber/float; a pixel in an FPS target.
To indicate a variable position and to enable the Scan Area and Motion settings, click the Position setting list box then click the Variable option.
MORE: For details about specifying the Scan Area, refer to Pixel Detection > Specifying the Scan Area Where a Variable Pixel Appears.
MORE: For details about dealing with moving pixels, refer to Pixel Detection > Dealing With Moving Pixels.
A real-time position means the position of the pixel to look for is where the cursor is located within the game window.
EXAMPLE: A pixel below the cursor manually positioned by the user; a pixel below the cursor positioned by another Trigger.
To indicate a real-time position, click the Position setting list box then click the Real-time option. No further configuration settings are applicable or need to be considered.
HINT: The Real-time option can be used when configuring Chimpeon as an "aim bot". It would be used to look for a pixel (i.e. the colour of a target to shoot at) at the current cursor position (determined by another Trigger) and if detected, fire the weapon. It overcomes the issue where a Trigger configured to look for the target is unable to move the crosshairs (cursor) to the target in the first attempt (due to many reasons such as mouse sensitivity) and as a result, fire the weapon prematurely. Using a second Trigger that uses the Real-time option ensures the weapon is only fired when the crosshair is actually on the target.
The position of the fixed pixel to look for can be specified in the following ways:
NOTE: The Fixed option of the Position setting must be selected before the position of a fixed pixel can be specified.
To use Snapshot to specify the position in the game window of the fixed pixel to look for, move the cursor within Snapshot then press the Ctrl key when the cursor is on top of the pixel. Following this, a large crosshair appears in Snapshot and the Fixed X and Fixed Y setting values indicate the position of the pixel relative to the game window.
MORE: For details about taking a Snapshot of Live, refer to Pixel Detection > Taking a Snapshot of Live.
To use the Fixed X and Fixed Y settings to specify the position in the game window of the fixed pixel to look for, perform the following actions:
Alternatively, click the speed buttons of the Fixed X or Fixed Y settings to increase or decrease the associated values. The mouse wheel can also be moved up and down to increase or decrease a value after clicking inside the associated edit box.
As the Fixed X and Fixed Y setting values are changed, the large crosshair in Snapshot moves to reflect the change.
NOTE: Only values that fall within the constraints of Snapshot can be specified for the Fixed X and Fixed Y settings. If the values are smaller or greater than these constraints then either the permitted minimum or maximum value is applied after taking focus away from the associated edit box.
When a pixel appears in a variable position within the game window, an area known as the Scan Area (see Fig. below) must be specified. The Scan Area is continually scanned in a specified direction for the variable pixel.
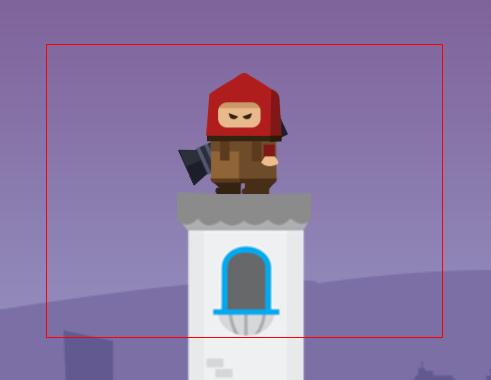
Fig. Scan Area
The size of a Scan Area can range from a minimum of 1 x 1 pixels up to the maximum dimensions of the game window.
CAUTION It is advised Scan Areas are specified as small as possible due to the large overhead they put on the CPU - especially when multiple Scan Areas are being used. Combining a small Scan Area with an appropriate scan direction will improve pixel detection times and the performance of Chimpeon.
The Scan Area can be specified in the following ways:
NOTE: The Variable option of the Position setting must be selected before a Scan Area can be specified.
To use the game window or Snapshot to specify the Scan Area, perform the following actions:
Following this, the border of the Scan Area appears in the game window and if applicable, Snapshot (unless the border is turned off using the Show Border setting).
To use the Top, Left, Bottom and Right settings to specify the Scan Area, perform the following actions:
Alternatively, click the speed buttons of the Top, Left, Bottom and Right settings to increase or decrease the associated values. The mouse wheel can also be moved up and down to increase or decrease a value after clicking inside the associated edit box.
As the Top, Left, Bottom and Right setting values are changed, the border of the Scan Area changes (unless the border is turned off using the Show Border setting).
NOTE: Only values that fall within the constraints of the game window can be specified for the Top, Left, Bottom and Right settings. If the values are smaller or greater than these constraints then either the permitted minimum or maximum value is applied after taking focus away from the associated edit box.
NOTE: If the incorrect game window has been selected for the associated Profile's Send To setting, specifying a scan area using Ctrl-T and Ctrl-B in the game window will not work properly. Instead, a scan area that is contained within the selected window can only be created. To resolve this, the correct game window will need to be found and selected for the Send To setting.
To show and hide the Scan Area border, click the Show Border setting checkbox to add or remove a tick. A tick indicates the border is shown. Blank indicates the border is hidden.
To change the colour of the Scan Area border, perform the following actions:
MORE: For details about using the Colour window, refer to Pixel Detection > Using the Colour Window.
The Direction setting determines the direction in which the Scan Area is scanned for a variable pixel. Selecting the most suitable scan direction for how and where a variable pixel appears in the Scan Area can reduce detection time.
To select a scan direction, click the Direction setting list box then click the required option.
The Direction setting has the following options:
The Restart When Pixel Detected setting determines whether the scan restarts at the beginning or continues to the end of the Scan Area when a pixel is detected. This is useful if only the first pixel encountered in the direction of the scan needs to be detected, or all pixels within the entire Scan Area need to be detected.
To restart the scan or continue to the end of the Scan Area when a pixel is detected, click the Restart When Pixel Detected setting checkbox to add or remove a tick. A tick indicates the scan is restarted. Blank indicates the scan continues.
The Colour setting determines whether the colour of the pixel to look for is a single colour or any colour within a range, and enables the settings associated with each option.
The Colour setting has the following options:
| NAME | DESCRIPTION |
|---|---|
| Single | Indicates the colour of the pixel to look for is a single colour, and enables the Single Colour settings. This is the default option. |
| Range | Indicates the colour of the pixel to look for is any colour within a range, and enables the Colour Range settings. |
A single colour means the colour of the pixel to look for remains constant.
EXAMPLE: A pixel in an MMORPG spell icon; a pixel in a notification button.
To indicate the colour of the pixel to look for is a single colour and to enable the Single Colour settings, click the Colour setting list box then click the Single option.
MORE: For details about specifying the Single Colour, refer to Pixel Detection > Specifying the Single Colour.
A colour range means the colour of the pixel to look for can be any colour within a range. Using a colour range is normally required when the colour of the pixel to look for changes due to lighting or because of streaming.
EXAMPLE: A pixel in an MMORPG fishing bobber/float; a pixel in an FPS target; a pixel in any object within a game being streamed.
To indicate the colour of the pixel to look for is anything within a range, and to enable the Colour Range settings, click the Colour setting list box then click the Range option.
MORE: For details about specifying the Colour Range, refer to Pixel Detection > Specifying the Colour Range.
If the pixel to look for remains a constant colour, the Single Colour (see Fig. below) should be specified.

Fig. Single Colour
The Single Colour can be specified in the following ways:
NOTE: To enable the Single Colour and use it when looking for a pixel, the Single option must be selected for the Colour setting.
To use Snapshot to specify the Single Colour, move the cursor within Snapshot then press the left mouse button when the cursor is on top of a suitable pixel. Following this, a small crosshair ( ) appears in Snapshot to indicate the location of the pixel used.
Instead of creating multiple Conditions that each look for a different pixel colour that appears in the same fixed position or within the same Scan Area, multiple colours can instead be assigned to the Single Colour using the Colour List.
MORE: For details about using the Colour List to determine the Single Colour, refer to Pixel Detection > Using the Colour List.
The Single Colour can be specified in the Colour window which is opened by clicking the Single Colour button (which is the colour block of the Single Colour).
MORE: For details about using the Colour window to specify the Single Colour, refer to Pixel Detection > Using the Colour Window.
To reset the Single Colour to the colour of the pixel selected in Snapshot or black (R0 G0 B0) if a pixel is not selected or a Snapshot has not been taken, click the Reset button ( ). Following this, a Reset Single Colour window is opened. Click the Yes button to confirm the reset or the cancel button to cancel the reset.
If the pixel to look for does not remain a constant colour, the Colour Range (see Fig. below) must be specified.

Fig. Colour Range
The Colour Range is determined by the left and right colour extremities. All colours including and between the left and right colour extremities are used when looking for a pixel.
The left and right colour extremities of the Colour Range can be specified in the following ways:
NOTE: To enable the Colour Range and use it when looking for a pixel, the Range option must be selected for the Colour setting.
To use Snapshot to select the left extremity of the Colour Range, move the cursor within Snapshot then press the left mouse button when the cursor is on top of a suitable pixel. Following this, a small crosshair ( ) appears in Snapshot to indicate the location of the pixel used.
To use Snapshot to select the right extremity of the Colour Range, move the cursor within Snapshot then press the right mouse button when the cursor is on top of a suitable pixel. Following this, a small crosshair ( ) appears in Snapshot to indicate the location of the pixel used.
Normally, when a game is streamed, the colour of the pixel to look for in the game window changes due to inconsistencies in the quality of the stream. Similarly, the pixel to look for can be affected by lighting within the game. Both these circumstances can result in the colour of the pixel to look for changing in such a way that the Colour Range defined using the other methods is unsuitable. To overcome this, the Colour Range must be specified so it encompasses the entire range of colours the pixel can change to. The Colour List is a quick and easy way to accomplish this without having to laboriously note the many RGB colour variations of the pixel then manually calculate the left and right extremities of the Colour Range.
MORE: For details about using the Colour List to determine the left and right extremities of the Colour Range, refer to Pixel Detection > Using the Colour List.
The left and right extremities of the Colour Range can be specified in the Colour window which is opened by clicking the associated colour extremity button (which is the colour block of the extremity).
MORE: For details about using the Colour window to specify the left and right colour extremities of the colour range, refer to Pixel Detection > Using the Colour Window.
To reset the left and right extremities of the Colour Range to the colours of the pixels selected in Snapshot or black (R0 G0 B0) if the pixels are not selected or a Snapshot has not been taken, click the Reset button ( ). Following this, a Reset Colour Range window is opened. Click the Yes button to confirm the reset or the cancel button to cancel the reset.
If the pixel to look for can be more than one colour or the pixel to look for is in a game window that is being streamed, the Colour List (see fig. below) will normally need to be used.

Fig. Colour List
As the name suggests, the Colour List is a list of colours derived from a pixel in Snapshot or the live game window. The colours accumulated in the Colour List determine the Single Colour and the Colour Range (whichever is selected for the Colour setting).
How the colours in the Colour List are used differs for the Single Colour and the Colour Range.
The Single Colour uses all colours accumulated in the Colour List meaning the pixel to look for can be any one of the colours.
As colours are added to the Colour List, the Single Colour changes to reflect these colours (see Fig. below).

Fig. Single Colour showing the colours in the Colour List
The left extremity of the Colour Range uses the colour in the Colour List with the lowest RGB values minus the - Buffer setting value.
EXAMPLE: If the Colour List contained R92 G58 B29 and R201 G153 B104 and the - Buffer setting value was set to 5, the left extremity of the colour Range would be R87 G53 B24.
The right extremity of the Colour Range uses the colour in the Colour List with the highest RGB values plus the + Buffer setting value.
EXAMPLE: If the Colour List contained R92 G58 B29 and R201 G153 B104 and the + Buffer setting value was set to 5, the right extremity of the colour Range would be R206 G158 B109.

Fig. Colour Range derived from the lowest and highest RGB values in the Colour List
MORE: For further details about the - Buffer and + Buffer settings, refer to Pixel Detection > Using the Colour List > Changing the Buffer.
To enable and disable the Colour List, click the Use Colour List setting checkbox to add or remove a tick. A tick indicates the Colour List is enabled. Blank indicates the Colour List is disabled.
NOTE: When the Colour List is enabled, changing the Single Colour and the Colour Range in the normal way cannot be performed.
The List Colour (see Fig. below) indicates the colour that can be added to the Colour List.

Fig. List Colour
The RGB values of the List Colour are displayed alongside the List Colour to help determine whether the List Colour should be added to the Colour List.
The List Colour can be specified in the following ways:
To use Snapshot to specify the List Colour, move the cursor within Snapshot then press the left mouse button when the cursor is on top of a suitable pixel. Following this, a small crosshair ( ) appears in Snapshot to indicate the location of the pixel to use. Now click the Live setting checkbox to add or remove a tick. A tick indicates the List Colour is derived from the pixel shown in the game window at the position specified in Snapshot. Blank indicates the List Colour is derived from the pixel shown in Snapshot.
HINT: Enable (tick) the Live setting checkbox when creating a Colour Range for detecting a pixel within a game window that is streamed.
EXAMPLE: A pixel in a spell icon of an MMORPG that is being streamed.
The List Colour can be specified in the Colour window which is opened by clicking the List Colour button (which is the colour block of the List Colour).
MORE: For details about using the Colour window to specify the List Colour, refer to Pixel Detection > Using the Colour Window.
The List Colour can be added to the Colour List automatically or manually. To determine this, click the Auto Add setting checkbox to add or remove a tick. A tick indicates the List Colour is added automatically. Blank indicates the List Colour is added manually by clicking the Add button ( ).
).
NOTE: No matter what method is used, the List Colour can only be added if it does not already exist in the Colour List.
CAUTION: If the Live setting is enabled (ticked) and the Auto Add setting is enabled (ticked) large numbers of List Colours will be quickly added to the Colour List if the game window is constantly changing at the location of the List Colour pixel specified in Snapshot.
NOTE: When using the Colour List to determine the Colour Range, the more colours that are added the more likely the associated pixel will be detected.
Using the Colour List to determine the Colour Range is a useful way of dealing with the colour variations of a pixel in a game window that is streamed. In order to add as many colours to the Colour List as possible so all the colour variations are accumulated and an optimal Colour Range is generated, it will be necessary to invoke a colour change in the game window. This can normally be achieved in the following ways within the game window:
To remove an individual colour from the Colour List, click it then click the Delete button ( ).
).
To remove all colours from the Colour List, click the Clear button ( ). Following this a Clear Colour List window is opened. Click the Yes button to clear the Colour List or the No button to cancel the clear.
The - Buffer and + Buffer settings are enabled when the Colour List is used to determine the Colour Range. Specifying one or both settings causes the Colour Range to become wider making it more likely the associated pixel will be detected. This is especially useful when looking for a pixel in a game window that is streamed where pixel colour variations often occur.
The - Buffer setting determines how much the RGB values of the left extremity of the Colour Range are reduced by.
EXAMPLE: If the RGB values for the left extremity of the Colour Range are R92 G58 B29, and the - Buffer setting value is 10, the left extremity of the Colour Range becomes R82 G48 B19.
The + Buffer setting determines how much the RGB values of the right extremity of the Colour Range are increased by.
EXAMPLE: If the RGB values for the right extremity of the Colour Range are R201 G153 B104, and the + Buffer setting value is 10, the right extremity of the Colour Range becomes R211 G163 B114.
The Single Colour, the left and right extremities of the Colour Range, and the List Colour are all buttons that, when clicked, open the Colour window (see Fig. below).
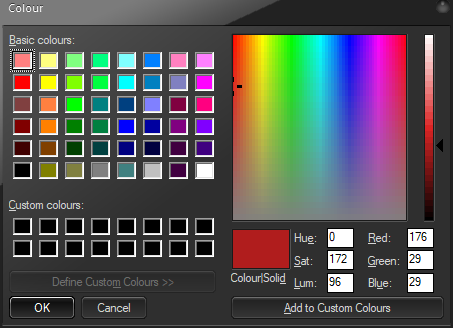
Fig. Colour window
The Colour window is used to specify HSL or RGB colour values or select a colour for the colour associated with the colour button used to open the window.
To specify HSL or RGB colour values, perform the following actions in the Colour window:
A colour can be selected from the Colour Picker and Luminosity Bar, the Basic Colours Palette, or the Custom Colours Palette.
To select a colour, click a colour in the Colour Picker, the Basic Colours Palette or the Custom Colours Palette then click the OK button to close the Colour window and apply the colour.
NOTE: When selecting a colour from the Colour Picker, the luminosity (brightness) of the colour may need to be specified using the Luminosity Bar. Click and hold the mouse button over the arrow to the right of the Luminosity Bar, move the arrow up and down to change the luminosity.
If a Condition needs to be satisfied when the pixel to look for moves in a particular direction within the Scan Area, motion settings must be specified.
EXAMPLE: A fishing bobber moving down when a fish is hooked; An enemy moving towards your character.
NOTE: Motion settings are only available when the Variable option is selected for the Position setting.
To enable and disable the motion settings, click the Use Motion setting checkbox to add or remove a tick. A tick indicates the motion settings are enabled. Blank indicates the motion settings are disabled.
The Up, Down, Left and Right settings determine the minimum distance in pixels the pixel to look for must move in the Up, Down, Left and Right direction from the last position it was detected within the Scan Area.
EXAMPLE: If a Condition needs to be satisfied when the pixel to look for moves at least 5 pixels down and at least 3 pixels right, the Down setting would be set to 5 and the Right setting would be set to 3.
To specify the minimum distance in pixels the pixel to look for must move, perform the following actions:
Alternatively, click the speed buttons of the Top, Bottom, Left and Right settings to increase or decrease the associated values. The mouse wheel can also be moved up and down to increase or decrease a value after clicking inside the associated edit box.
MORE: For details about determining the value to specify for the Top, Bottom, Left and Right settings, refer to Pixel Detection > Monitoring the Motion Range.
Min and Max values appear above the Up, Down, Left and Right setting edit boxes. These indicate the minimum distance and maximum distance in pixels the pixel to look for has moved since it was first detected in the Scan Area to when it was last detected. These values are useful for determining the value to specify for the Top, Bottom, Left and Right settings.
EXAMPLE: The pixel in an MMORPG fishing bobber has a minimum down motion of 1 pixels and a maximum down motion of 3 pixels all the while it is just bobbing about. When a fish is hooked, the pixel moves down and the minimum down motion changes to 3 pixels and the maximum down motion changes to 9 pixels. In order for the pixel to be considered detected when a fish is hooked (and as a result click the bobber to catch the fish), the Down setting would be set to a value of 4 or more pixels.
As the name suggests, the pixel detection functionality of Chimpeon is aimed at detecting a pixel in a fixed position, a variable position or at the current cursor position in the game window. However, being able to satisfy a Condition when a pixel is not detected can also be useful.
EXAMPLE: Satisfy a Condition when a pixel is not detected in the portrait of an enemy so a key can be pressed to target an enemy.
To detect or not detect a pixel, click the Not setting checkbox to add or remove a tick. A tick indicates the pixel to look for must not be detected to satisfy the associated Condition. Blank indicates the pixel to look for must be detected to satisfy the associated Condition.
Configuring Chimpeon to look for a pixel in the game window can sometimes be difficult. Therefore, being able to monitor the results is paramount to creating a configuration that works as expected. The following functionality is provided to assist with this during configuration or after Chimpeon is started:
| NAME | DESCRIPTION |
|---|---|
| Hits p/s | Displays how many times per second the pixel to look for is detected or not detected (if the Not setting is enabled) in the position determined by the Fixed X and Fixed Y settings, within the Scan Area or at the current cursor position. Located above Live in the Pixel Detection window. |
| Live Border Colour | When the pixel to look for is detected or not detected (if the Not setting is enabled) in the position determined by the Fixed X and Fixed Y settings, within the Scan Area or at the current cursor position, the border of Live is green. When the pixel to look for is not detected or detected (if the Not setting is disabled) in the position determined by the Fixed X and Fixed Y settings, within the Scan Area or at the current cursor position, the border of Live is red. |
| Log | Indicates whether an Action is performed as a result of the pixel to look for being detected or not detected (if the Not setting is enabled). |
In this section, the following information is provided:
Configuring what keys to use and what mouse actions to perform for an Action occurs in the Keys/Mouse window (see Fig. below) which is opened by performing the following actions:
 ) to the right of the Perform setting list box.
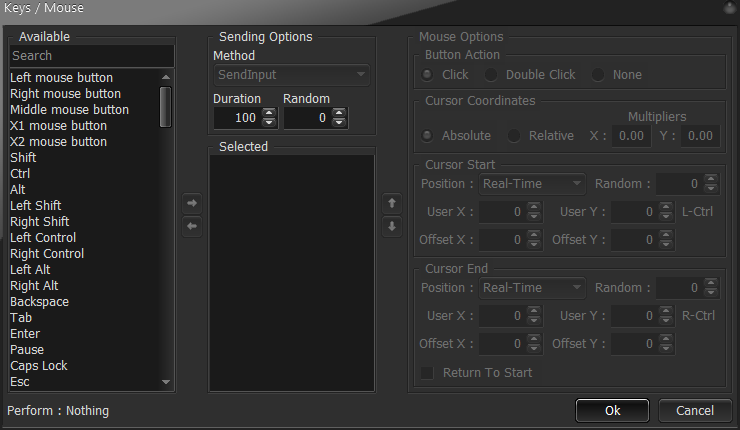
Fig. Keys/Mouse window
The Keys/Mouse window (see Fig. above) is split into the following four panels each of which contain related configuration settings and components:
| NAME | DESCRIPTION | VALUE(S) | DEFAULT |
|---|---|---|---|
| Method | Determines the mechanism used to send a key press or mouse action to the game. | Post Send SendInput |
SendInput |
| Duration | Determines the number of milliseconds the selected key(s) or mouse button(s) are pressed or how long a mouse movement is performed for. The associated Thread is delayed throughout the duration. |
0 to 99999 | 0 |
| Random | Determines how many milliseconds either side of the Duration setting value a random duration is derived from. | 0 to 9999 | 0 (not random) |
| NAME | DESCRIPTION | VALUE(S) | DEFAULT |
|---|---|---|---|
| Available | Lists the keys and mouse buttons that can be selected. | All keys and most mouse buttons | n/a |
| NAME | DESCRIPTION | VALUE(S) | DEFAULT |
|---|---|---|---|
| Selected | Lists the selected keys and mouse buttons. | All keys and mouse buttons that appear in the Available panel | Blank |
| NAME | DESCRIPTION | VALUE(S) | DEFAULT |
|---|---|---|---|
| Button Action | Determines how the mouse button is pressed. | Click Double Click None |
Click |
| Cursor Coordinates | Determines whether the cursor moves within the game window or whether the game window moves when the mouse is moved. | Absolute Relative |
Absolute |
| Multiplier X | Determines the x-axis multiplier when the Relative option is selected for the Cursor Coordinates setting. | 0.00 to 9.99 | 1.00 |
| Multiplier Y | Determines the y-axis multiplier when the Relative option is selected for the Cursor Coordinates setting. | 0.00 to 9.99 | 1.00 |
| Cursor Start Position | Determines the start position of the cursor. | Last Position Detected Real-Time User [Condition name] |
Last Position Detected (if there is an associated Condition with the Pixel Detection option specified for the Process setting) or Real-Time |
| Random | Determines how many pixels above or below and left or right of the cursor start position a random cursor start position is derived from. | 0 to 9999 | 0 (not random) |
| User X | Determines the x-axis position of where in the game window the cursor starts when the User option is selected for the Cursor Start Position setting. | 0 to maximum horizontal game window size in pixels | 0 |
| User Y | Determines the y-axis position of where in the game window the cursor starts when the User option is selected for the Cursor Start Position setting. | 0 to maximum vertical game window size in pixels | 0 |
| Offset X | Determines the number of pixels the cursor is offset in the x-axis from the cursor start position. | 0 to the minimum or maximum horizontal game window size in pixels | 0 |
| Offset Y | Determines the number of pixels the cursor is offset in the y-axis from the cursor start position. | 0 to the minimum or maximum vertical game window size in pixels | 0 |
| Cursor End Position | Determines the end position of the cursor. | Last Position Detected Real-Time User [Condition name] |
Last Position Detected (if there is an associated Condition with the Pixel Detection option specified for the Process setting) or Real-Time |
| Random | Determines how many pixels above or below and left or right of the cursor end position a random cursor end position is derived from. | 0 to 10 | 0 (not random) |
| User X | Determines the x-axis position of where in the game window the cursor ends when the User option is selected for the Cursor End Position setting. | 0 to maximum horizontal game window size in pixels | 0 |
| User Y | Determines the y-axis position of where in the game window the cursor ends when the User option is selected for the Cursor End Position setting. | 0 to maximum vertical game window size in pixels | 0 |
| Offset X | Determines the number of pixels the cursor is offset in the x-axis from the cursor end position. | 0 to the minimum or maximum horizontal game window size in pixels | 0 |
| Offset Y | Determines the number of pixels the cursor is offset in the y-axis from the cursor end position. | 0 to the minimum or maximum vertical game window size in pixels | 0 |
| Return to Start | Determines whether the cursor returns to the cursor start position or remains at the cursor end position. | Ticked (return to start position) Blank (remain at end position) |
Blank (remain at end position) |
The Method setting determines the mechanism used to send a key press or mouse action to the game.
The Method setting has the following options:
| NAME | DESCRIPTION |
|---|---|
| Post | Suitable for some games but certain mouse actions may not work. Currently unavailable. |
| Send | Suitable for some games but certain mouse actions may not work. Currently unavailable. |
| SendInput | Suitable for most games. The game must be focused (selected). This is the default option. |
The Post option for the Method setting is suitable for some games but certain mouse actions may not work. If having the game window unfocussed is required (so you can perform other tasks in other applications), the Post option should be tried.
To use Post, click the Method setting then click the Post option.
The Send option for the Method setting is suitable for some games but certain mouse actions may not work.
To use Send, click the Method setting then click the Send option.
The SendInput option for the Method setting is suitable for almost all games and all mouse actions are likely to work. However, the game window must be focused (selected) to enable SendInput to send keystrokes and mouse actions to it.
To use SendInput, click the Method setting then click the SendInput option.
NOTE: To ensure keystrokes and mouse actions are successfully sent to the game when using the SendInput option, the Duration setting may need to have a positive value specified (e.g. 100).
Certain games may require a key or mouse button to be pressed for a specific amount of time. This will be to either perform a specific task correctly or for the game to recognise whether a key or mouse button has been pressed.
The Duration setting determines the number of milliseconds the selected keys and mouse buttons are pressed for. It also determines how long the mouse cursor takes to move from the cursor start position to the cursor end position.
To specify how long the selected keys and mouse buttons are pressed for and how long mouse movement is performed for, perform the following actions:
NOTE: The associated Thread is delayed throughout the duration, meaning Triggers in the Thread are not checked until the duration expires.
If key presses and mouse actions are continually performed for the same length of time, game developers may be able to determine Chimpeon is being used. Therefore, introducing a random element to their use will make in-game actions more human-like and less detectable.
The Duration setting has an associated Random setting. This determines the number of milliseconds either side of the Duration setting value a random duration is derived from.
EXAMPLE: If the Random setting value is 2000 milliseconds and the associated Duration setting value is 10000 milliseconds, the random duration is any value between 8000 and 12000 milliseconds.
NOTE: Specifying 0 as the value for the Random setting means the associated duration is not random.
To make the duration random (or not random if 0 is specified), perform the following actions:
All keys and mouse buttons that can be selected and used are listed in the Available panel. To use one or more of them they must be moved to the Selected panel.
To move a key or mouse button from the Available panel to the Selected panel, click the key or mouse button in the Available panel then click the Move to Selected button ( ).
).
NOTE: Only one mouse button can be moved to the Selected panel at any one time.
NOTE: If only mouse movement needs to be performed, select one of the mouse buttons.
To quickly find a key or mouse button in the Available panel, click inside the Search edit box then type the value of the key or mouse button. Following this, and if the key or mouse button is found, it will be highlighted in the Available panel.
EXAMPLE: Type spacebar (or even sp) to highlight Spacebar in the Available panel.
The order modifier keys (Alt, Ctrl and Shift) are pressed prior to other keys or a mouse button being simultaneously pressed is determined by the order they appear in the Selected panel.
EXAMPLE: If Alt then G are listed in the Selected panel, then Alt followed by G are pressed.
To change the order keys and mouse buttons appear in the Selected panel, perform the following actions:
 ) or Down button (
 ) to the right of the Selected panel until the key or mouse button is positioned as required.
To remove a key or mouse button from the Selected panel it must be moved back to the Available panel. To move a key or mouse button to the Available panel, click the key or mouse button in the Selected panel then click the Move to Available button ( ).
).
To access the mouse settings in the Mouse panel, click a mouse button (e.g. Left mouse button) in the Selected panel.
Normally, when a mouse button is selected, an action such as clicking or double clicking will need to be specified so something within the game can be performed. The Button Action setting enables this.
The Button Action setting has the following options:
| NAME | DESCRIPTION |
|---|---|
| Click | Performs a single click of the mouse button. This is the default option. |
| Double Click | Performs a double click of the mouse button. |
| None | Nothing is performed and this should be selected if only the cursor needs to be moved. |
If an item in the game window such as a button or an enemy needs to be clicked, the Click option for the Button Action setting must be selected.
To perform a single click of the mouse button, click the Click radio button for the Button Action setting.
NOTE: The Duration setting determines the time between the button down and button up action of the click.
If an item in the game window such as a button needs to be double clicked, the Double Click option for the Button Action setting must be selected.
To perform a double click of the mouse button, click the Double Click radio button for the Button Action setting.
NOTE: The Duration setting determines the time between each button click.
NOTE: When the Double Click option for the Button Action is selected, the Cursor End settings are disabled because they become irrelevant.
If the cursor needs to be moved from its existing position to another position in the game window without the mouse button being pressed, the None option for the Button Action setting must be selected.
EXAMPLE So the cursor/crosshair tracks a target in an FPS without shooting it.
To not press the mouse button, click the None radio button for the Button Action setting.
NOTE: The Duration setting is still performed and determines how long it takes the mouse button to move from the start position to the end position (if specified).
Moving the mouse either moves the cursor within the game window or moves the view within the game window. The Cursor Coordinates setting enables one of these methods to be used.
The Cursor Coordinates setting has the following options:
| NAME | DESCRIPTION |
|---|---|
| Absolute | Moves the cursor within the game window. This is the default option. |
| Relative | Moves the view within the game window while the cursor remains in a fixed position (normally the center) and enables the Multiplier X and Multiplier Y settings. |
If the cursor needs to be moved to a position within the game window, the Absolute option for the Cursor Coordinates setting must be selected.
EXAMPLE: Moving the cursor to a button so it can be clicked.
To move the cursor within the game window, click the Absolute radio button for the Cursor Coordinates setting.
If the view within the game window needs to be moved while the cursor remains in a fixed position (normally the centre), the Relative option for the Cursor Coordinates setting must be selected.
EXAMPLE: Moving the view in an FPS game to position an enemy within the crosshair.
To move the view within the game window and enable the Multiplier X and Multiplier Y settings, click the Relative radio button for the Cursor Coordinates setting.
Due to many factors including mouse sensitivity and the distance from point A to point B in the game window, moving the view within the game window (like in an FPS game) may not be optimal with the default settings. As a result, the view may move too slowly (the "jumps" required to move from point A to point B in the game window are too small) or too fast (the "jumps" required to move from point A to point B in the game window are too large). To overcome this, the Multiplier X and Multiplier Y settings are provided.
If the view within the game window moves too slowly from point A to point B then increase the Multiplier X and/or Multiplier Y settings.
If the view within the game window moves too fast from point A to point B (and possibly even going past point B then back to point B) then decrease the Multiplier X and/or Multiplier Y settings.
The Multiplier X and Multiplier Y settings determine the efficiency of moving the view of the game window and therefore, if used for an FPS aim bot, how quickly a target ends up within the crosshair ready to be shot. It is therefore important to spend time finding the optimal values for these settings.
To change the Multiplier X and Multiplier Y setting values, perform the following actions:
NOTE: The Absolute option of the Cursor Coordinates setting must be selected before the Multiplier X and Multiplier Y settings are enabled.
NOTE: If the game allows, changing settings such as mouse sensitivity within the game will also have a similar result as changing the Multiplier X and Multiplier Y settings.
The start position of the cursor must be specified so Chimpeon knows where in the game window to initially move the cursor to after the associated Expression is satisfied.
EXAMPLE: Move the cursor to a target when a pixel within it is detected (e.g. to shoot an enemy in an FPS game); Remain in the current cursor position (e.g. to repeatedly click in a clicker game); Move the cursor over a button when a pixel within it is detected (e.g. to start a dungeon or raid in an MMORPG).
The end position of the cursor must be specified so Chimpeon knows where in the game window to move the cursor to after it has moved to the start position.
EXAMPLE: Move the cursor so a game item (that was picked up at the start position) is placed somewhere else.
The Cursor Start Position and Cursor End Position settings determine the start position and end position of the cursor respectively.
The Cursor Start Position and Cursor End Position settings have the following options:
| NAME | DESCRIPTION |
|---|---|
| Last Detected | Uses the last detected pixel position as the start position or end position of the cursor. This is the default option for the start position when the Pixel Detection option is selected for an associated Condition's Process setting. |
| Real-Time | Uses the current cursor position as the start position or end position of the cursor. This is the default option when the Pixel Detection option is not selected for an associated Condition's Process setting. This is the default option for the end position. |
| User | Uses a user defined cursor position as the start position or end position of the cursor and enables the User X and User Y settings. |
| [Condition name] | Uses the detected pixel position of the named Condition as the start position or end position of the cursor. Only Conditions that use the Pixel Detection option for the Process setting appear as an option. |
If the Pixel Detection option for an associated Condition's Process setting is used, the last detected pixel position can be used to determine the start position and end position of the cursor.
EXAMPLE: When a pixel is detected in a target that needs to be shot; When a pixel is detected in a resource icon that needs to be collected; When a pixel is detected in a button that needs to be pressed.
To use the last detected pixel position as the start position or end position of the cursor, click the Cursor Start Position or Cursor End Position list box then click the Last Detected option.
The real-time (current) cursor position in the game window can be used as the start position and end position of the cursor.
EXAMPLE: When the cursor has already been moved to a position in the game window (like a target) by another Trigger; when the cursor is anywhere in the game window and pressing a mouse button performs something (i.e. a clicker game); when the cursor has been manually moved.
To use the real-time cursor position as the start position or end position of the cursor, click the Cursor Start Position or Cursor End Position list box then click the Real-Time option.
HINT: The Real-time option can be used when configuring Chimpeon as an FPS "aim bot". It would be used to click the mouse button (which fires the weapon) at the current mouse cursor position if an associated Condition detected a pixel in the target. It overcomes the issue where a Trigger configured to look for the target is unable to move the crosshairs (mouse cursor) to the target in the first attempt (due to many reasons such as mouse sensitivity and the distance from the target to the crosshair) and as a result, fire the weapon prematurely and miss the target. Using a second Trigger that uses the Real-Time option for pixel detection and for pressing the mouse button, ensures the weapon is only fired when the crosshair is actually on the target.
If the cursor does not need to be moved to a different position after it has been moved to its start position (i.e. a different cursor end position to that of the cursor start position is not required) the Real-Time option should be selected for the Cursor End Position setting.
A user defined position can be used as the start position and end position of the cursor.
EXAMPLE: When any object that always appears in a fixed position in the game window needs to be selected or pressed.
To use a user defined position as the start position or end position of the cursor and to enable the User X and User Y settings, click the Cursor Start Position or Cursor End Position list box then click the User option.
MORE: For details about specifying the User X and User Y settings, refer to Keys and Mouse > Specifying a User Defined Cursor Position.
If a Trigger has more than one Condition that uses pixel detection, the last detected pixel (derived from the last Condition in the Conditions panel that uses pixel detection) would be used when the Last Detected option for the Cursor Start Position or Cursor End Position setting is specified. However, if a pixel that is not the last detected pixel needs to be the start position or end position of the cursor, the required Condition can be specified.
To use the detected pixel position of a Condition as the start position or end position of the cursor, click the Cursor Start Position or Cursor End Position list box then click the name of the Condition.
If the cursor is continually moved to the same position, game developers may be able to determine that an automated process is being used. Therefore, introducing a random element to the cursor position will make it more human-like and likely less detectable.
The Cursor Start Position setting and Cursor End Position setting each have an associated Random setting. Each determines whether the start position and end position of the cursor is random or not random by a specified number of pixels above or below and left or right from where the cursor would normally be positioned.
EXAMPLE: If the Random setting value is 5 pixels and the X coordinate of the cursor is 20 and the Y coordinate of the cursor is 30, the random position for the X coordinate is any value between 15 and 25 and the random position for the Y coordinate is any value between 25 and 35.
NOTE Specifying 0 as the value for the Random setting means the associated cursor position is not random.
To make the start position or end position of the cursor random (or not random if 0 is specified), perform the following actions:
When the cursor always needs to be in a specific start position or end position, a user defined cursor position can be specified.
EXAMPLE: To move the cursor to a button that always appears in the same position.
A user defined cursor position can be specified in the following ways:
NOTE: The User option for the Cursor Start Position or Cursor End Position setting must be selected before an associated user defined cursor position can be specified.
To specify a user defined start position or end position for the cursor using the game window, position the cursor in the required position within the game window then press the left CTRL key for the cursor start position or the right CTRL key for the cursor end position. Following this, the coordinates of the position appear in the associated User X and User Y setting edit boxes.
To specify a user defined start position or end position for the cursor using the User X and User Y settings, perform the following actions:
If the cursor start position or cursor end position is not actually the required cursor position, then the cursor position can be offset.
EXAMPLE: To move the crosshair in an FPS so it targets a specific yet undetectable part of the enemy; to move the crosshair in front of a moving target so the bullet hits it (i.e. leading the target).
The Offset X and Offset Y settings determine how far in pixels the start position and end position of the cursor are offset in the x-axis and y-axis from the start position and end position of the cursor respectively. A positive value offsets the cursor to the right in the x-axis and down in the y-axis. A negative value offsets the cursor left in the x-axis and up in the y-axis.
EXAMPLE: If the x-axis coordinate for the cursor start position is 20 pixels and the Offset X setting value is 5 pixels, the x-axis coordinate for the cursor start position becomes 25 pixels.
To specify an offset, perform the following actions:
If the end position of the cursor needs to be different to the start position of the cursor and the cursor needs to return to the start position, the Return to Start setting can be enabled.
To keep the cursor at the end position or immediately make it return to the start position, click the Return to Start checkbox to add or remove a tick. A tick indicates the cursor returns to the start position. Blank indicates the cursor remains at the end position.
HINT: If immediately returning the cursor to the start position does not achieve its purpose, a second Action can be configured to move the cursor from the end position to the start position instead. Use the Real-time option for the Cursor Start Position setting (i.e. the other Action's end position) and the User Defined option for the Cursor End Position setting. Now set the User X and User Y settings to the values of the other Action's end position.
In this section, the following information is provided:
If a sequence of keystrokes and mouse actions performed in a game need to be performed by Chimpeon, they can be recorded as a macro. This macro can then be performed for an Action.
EXAMPLE: In an MMORPG, every 10 seconds you could use a macro to interact with an NPC merchant, buy items from them, then perform a sequence of actions to craft something from the items purchased.
A macro is recorded in the Macro window (see Fig. below) which is opened by performing the following actions:
 ) to the right of the Perform setting list box.
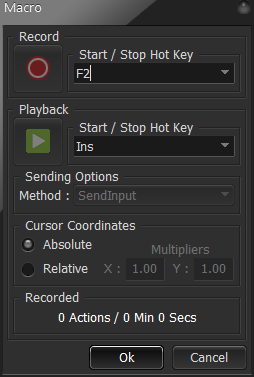
Fig. Macro window
Keystrokes and mouse actions are recorded for the game specified for the Send To setting of the Profile.
The Macro window (see Fig. above) has the following configuration settings and components:
| NAME | DESCRIPTION | VALUE(S) | DEFAULT |
|---|---|---|---|
| Record Start/Stop button | Starts and stops the recording of a macro. | ||
| Record Start/Stop Hot Key | Determines the key used to start and stop recording of a macro. | F2 | |
| Playback Start/Stop button | Starts and stops the playback of the macro. | ||
| Playback Start/Stop Hot Key | Determines the key used to start and stop the playback of the macro. | Ins (Insert) | |
| Cursor Coordinates | Determines whether the cursor moves within the game window (like an MMORPG) or whether the game window moves when the mouse is moved (like an FPS). | Absolute Relative |
Absolute |
| Multiplier X | Determines the x-axis multiplier when the Relative option is selected for the Cursor Coordinates setting. | 0.00 to 9.99 | 1.00 |
| Multiplier Y | Determines the y-axis multiplier when the Relative option is selected for the Cursor Coordinates setting. | 0.00 to 9.99 | 1.00 |
| Recorded | When recording, the panel indicates the number of recorded keystrokes and mouse actions, and the duration of the macro in minutes and seconds. During playback, the panel shows a progress bar, the percentage of progress, and the number of minutes and seconds that have been played. |
To start or stop the recording of a macro, perform one of the following actions:
*NOTE: Using the Record Start/Stop button may not be preferable because the mouse cursor needs to be moved from and to it, the process of which is recorded. It is therefore recommended to use the Record Start/Stop Hot Key when (and if applicable) the position of the cursor is at the correct start location in the game.
Prior to using a recorded macro, it is advised it is tested.
To playback a macro, perform the following actions:
*NOTE: Using the Playback Start/Stop button may not be preferable because the mouse cursor needs to be moved from it to the game, the process of which will be interupted by the keystrokes and mouse actions of the macro. It is therefore recommended to use the Playback Start/Stop Hot Key when (and if applicable) the position of the cursor is at the correct start location in the game.
In this section, the following information is provided:
Status Hot Keys are used to turn on, turn off and execute one or more Triggers manually or automatically while Chimpeon is started.
EXAMPLE: Manually press a key to turn off single target spell Triggers and turn on multi-target spell Triggers.
EXAMPLE: Automatically turn off a Trigger when the Expression associated with another Trigger is satisfied.
Turning on sets the Status setting of the Trigger to On. Turning off sets the Status setting of the Trigger to Off. Executing checks to see if the Expression associated with the Trigger is satisfied and if it is the associated Action(s) are performed.
Status Hot Keys are displayed and managed in the Status Hot Keys window (see Fig. below) which is opened by clicking the Status Hot Keys button ( ) (above the Triggers panel).
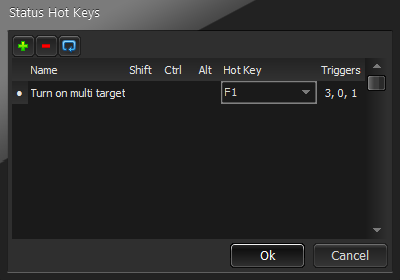
Fig. Status Hot Keys window
Each Status Hot Key has the following configuration settings:
| NAME | DESCRIPTION | VALUE(S) | DEFAULT |
|---|---|---|---|
| Shift | Determines whether the Shift key must be pressed at the same time as the key specified for the Hot Key setting. | Ticked (pressed) Blank (not pressed) |
Blank (not pressed) |
| Ctrl | Determines whether the Ctrl key must be pressed at the same time as the key specified for the Hot Key setting. | Ticked (pressed) Blank (not pressed) |
Blank (not pressed) |
| Alt | Determines whether the Alt key must be pressed at the same time as the key specified for the Hot Key setting. | Ticked (pressed) Blank (not pressed) |
Blank (not pressed) |
| Hot Key | Determines the key that must be pressed to turn on, turn off and/or execute specified Triggers. Not required if the associated Status Hot Key will be used automatically (i.e. by specifying it for an Action's Perform setting value. | Any key | Blank |
| Triggers | Displays how many Triggers are set to turn off, execute and turn on (n,n,n) and provides a button for opening the Status Hot Key Triggers window (see Fig. below). | n/a | n/a |
Status Hot Keys can be selected, added, deleted, duplicated and moved.
MORE: For details about these processes, refer to Getting Started > Interface Overview > Using Panels and Managing Items.
The Shift, Ctrl and Alt settings determine whether a corresponding modifier key should be pressed at the same time as the key specified for the Hot Key setting.
Click the Shift, Ctrl or Alt setting checkbox then click it again to add or remove a tick. A tick indicates the associated key must be pressed. Blank indicates the associated key is not used.
The Hot Key setting determines the key that must be pressed to turn on, turn off and/or execute specified Triggers manually.
NOTE: The Hot Key setting is not required (and can be left blank) if the associated Status Hot Key will be used automatically (i.e. by specifying it for an Action's Perform setting value.
To specify a key, perform the following actions:
A Status Hot Key can perform one or more of the following actions when used:
One or more Triggers can be assigned to these actions in the Status Hot Key Triggers window (see Fig. below) which is opened by clicking the Triggers button (...) of a Status Hot Key in the Status Hot Keys window (see Fig. above).
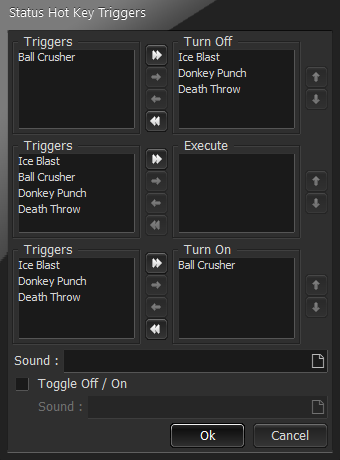
Fig. Status Hot Key Triggers window
One or more Triggers can be turned on (i.e. the Status setting for the Trigger(s) changes to On) when the associated Status Hot Key is manually or automatically used. This is accomplished by moving the required Trigger(s) to the Turn On panel in the Status Hot Key Triggers window (see Fig. above).
MORE: For further details about moving Triggers to the Turn On panel, refer to Moving Triggers.
One or more Triggers can be executed (if their associated Expression is satisfied) when the associated Status Hot Key is manually or automatically used. This is accomplished by moving the required Trigger(s) to the Execute panel in the Status Hot Key Triggers window (see Fig. above).
MORE: For further details about moving Triggers to the Execute panel, refer to Moving Triggers.
One or more Triggers can be turned off (i.e. the Status setting for the Trigger(s) changes to Off) when the associated Status Hot Key is manually or automatically used. This is accomplished by moving the required Trigger(s) to the Turn Off panel in the Status Hot Key Triggers window (see Fig. above).
MORE: For further details about moving Triggers to the Turn Off panel, refer to Moving Triggers.
The Toggle Off/On setting determines whether a Status Hot Key operates like a toggle or not.
To enable or disable the toggle, click the Toggle Off/On setting checkbox to add or remove a tick. A tick enables the toggle and causes Triggers in the Turn On and Turn Off panels to be turned on or turned off respectively when the Status Hot Key is used for the first time then turned off or turned on respectively when the Status Hot Key is used for the second time. Blank disables the toggle.
EXAMPLE (if enabled): If a Status Hot Key is configured to turn off Trigger A and turn On Trigger B, the first use would turn off Trigger A and turn on Trigger B, and the second use would turn on Trigger A and turn off Trigger B.
MORE: For details about applying a sound to the Toggle Off/On setting, refer to Applying a Sound.
To receive an audible indication of when a Status Hot Key is pressed, a sound file (WAV) can be selected and applied to it. An additional sound file can also be applied to the Toggle Off/On setting if it is enabled.
To add a sound file, perform the following actions:
 ) to the right of the applicable Sound edit box in the Status Hot Key Triggers window to open the Browse window.
Triggers can be moved from their Triggers panel to the associated Turn On, Execute or Turn Off panel and vice versa using the Move All and Move Selected buttons provided in the Status Hot Key Triggers window (see Fig. above).
To move a single Trigger, click it then click the appropriate Move Selected button.
To move multiple Triggers in the same panel, hold the Ctrl key, click each Trigger in turn, release the Ctrl key then click the appropriate Move Selected button.
To move all Triggers in the same panel, click the appropriate Move All button.
The order in which Triggers appear in the Turn On, Execute and Turn Off panels of the Status Hot Key Triggers window (see Fig. above), determines the order they are either turned on, executed or turned off.
To move a single Trigger, click it then click the associated Up button or Down button to move it up or down in the panel.
To move a multiple Triggers in the same panel, hold the CTRL key, click each Trigger in turn, release the Ctrl key then click the associated Up button or Down button to move them up or down in the panel.
In this section, the following information is provided:
Preferences are configuration settings that control general aspects of Chimpeon or determine the default values of other configuration settings. All appear in the Preferences window (see Fig. below) which is opened by clicking the Options menu then clicking the Preferences option.
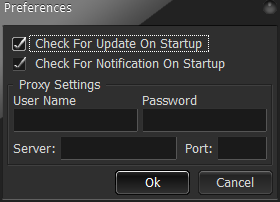
Fig. Preferences window
Click the OK button to close the Preferences window and apply the changes made to configuration settings.
Click the Cancel button to close the Preferences window and cancel the changes made to configuration settings.
The Preferences window has the following configuration settings:
The following general settings appear in the Preferences window:
The Update window that opens by default when Chimpeon is launched and when an update is available, is enabled and disabled in the Preferences window using the Check For Update on Launch setting.
Click the Check For Update On Launch setting checkbox to add or remove a tick. A tick enables (opens) the Update window on launch if an update is available. Blank disables (does not open) the Update window on launch.
NOTE: If a critical update is available (i.e. an update that must be performed to continue using Chimpeon), the Critical Update window is opened on startup even if the Check For Update On Launch setting is disabled.
MORE: For further details about updating Chimpeon, refer to Getting Started > Updating.
MORE: For further details about the Update window, refer to Getting Started > Launching > Launch Windows > Update.
The Notification window that opens by default when Chimpeon is launched and when a notification is available, is enabled and disabled in the Preferences window using the Check For Notification on Launch setting.
Click the Check For Notification On Launch setting checkbox to add or remove a tick. A tick enables (opens) the Notification window on startup if a notification is available. Blank disables (does not open) the Notification window on startup.
MORE: For further details about the Notification window, refer to Getting Started > Launching > Launch Windows > Notification.
If your PC connects to the Internet using a proxy it is likely proxy settings will need to be specified so Chimpeon can connect to the Chimpeon server.
MORE: For further details about proxy settings, refer to Getting Started > Proxy Settings.
In this section, the following information is provided:
The Log shows useful information about what Chimpeon is doing when it is started. It is provided to troubleshoot issues, monitor performance or simply show that something is happening.
Log messages appear in the Log panel (see Fig. below) which is displayed by clicking the Log tab.
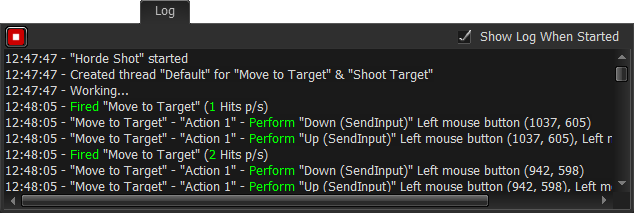
Fig. Log panel
CAUTION: When Chimpeon is started, messages already displayed in the Log panel are removed prior to new ones being added.
The Log panel displays the following messages all of which are prefixed with the time they occurred:
| NAME | DESCRIPTION |
|---|---|
| Caching... [path and file name of sound file] | Indicates the stated start or stop sound file has been cached. |
| Chimpeon has stopped because it is not activated | Indicates Chimpeon is not activated. Sign up for an account, buy a licence and activate. |
| Created thread "[Thread name]" for "[Trigger name]" | Indicates the named Thread has been created for one or more named Triggers. |
| Destroyed thread "[Thread name]" | Indicates the named Thread has been destroyed (stopped). |
| Fired "[Trigger name]" | Indicates the name of the Trigger that has been fired (i.e. the associated Expression is satisfied). |
| No Actions found in "[Trigger name]" | Indicates there are no Actions for the named Trigger. |
| No Active Actions found in "[Trigger name]" | Indicates there are no active Actions for the named Trigger. |
| No Active Conditions found in "[Trigger name]" | Indicates there are no active Conditions for the named Trigger. |
| No Conditions found in "[Trigger name]" | Indicates there are no Conditions for the named Trigger. |
| "[Profile name]" started | Indicates Chimpeon and the named Profile has been started |
| "[Profile name]" stopped | Indicates Chimpeon and the named Profile have been stopped. |
| Stopping... | Indicates Chimpeon has been stopped and is now waiting for unfinished processes to be completed. |
| "[Trigger name]" - "[Action name]" - Perform | Indicates what has been performed (e.g. pressing a key down) for the named Trigger and associated Action. |
| Working... | Indicates Chimpeon is working (i.e. it is processing Conditions and Actions). |
The Log panel can display a huge number of messages when Chimpeon is started. As a result, the performance of Chimpeon can be reduced which can cause processes such as pixel detection to be less than optimal. Therefore, the Log can be turned off to prevent messages being displayed and maximise performance.
Click the Start Log button (see Fig. below) to show messages in the Log panel when Chimpeon is started.

Fig. Start Log button
Click the Stop Log button (see Fig. below) to prevent messages being shown in the Log panel when Chimpeon is started.

Fig. Stop Log button
The Show Log When Started setting is used to automatically show or not show the Log panel when Chimpeon is started.
Click the Show Log When Started setting checkbox to add or remove a tick. A tick causes the Log panel to be shown when Chimpeon is started. Blank prevents the Log panel being shown when Chimpeon is started (unless it is already shown).
If you encounter a problem while using Chimpeon, it may be beneficial to copy the content of the log and send it to Fly Software so they can better ascertain what caused the issue.
To copy the content of the log to the Windows Clipboard, click the Copy Log button ().
In this section, the following information is provided:
Chimpeon is a complex application as are the tasks it is developed to perform. It is therefore expected that automating a game will not work immediately after creating a configuration, and time and patience will be required to resolve issues and optimise what you want it to do. Remember, Chimpeon can't magically do everything in a game so it is important you know its limitations and take the time to learn what it can do using the resources provided.
The following resources will help you overcome problems encountered when using Chimpeon or give you a head start on configuring specific tasks:
| RESOURCE | DESCRIPTION | LINK |
|---|---|---|
| Help | The Chimpeon help is the first resource you should consult if you're scratching your head over an issue or wanting to learn more about the wealth of features Chimpeon contains. | chimpeon.com/support/help?id=2 |
| How To Guides | If you're after guidance on specific tasks such as creating an aim bot or configuring Chimpeon to fish in an MMORPG then head here. | chimpeon.com/support/how-to-guides |
| Videos | We know our millennial users can barely read so we've created a handful of videos that provide guidance on specific tasks. COMING SOON! | chimpeon.com/support/videos |
| Profiles | When you don't know where to begin, then import one of our pre-configured Profiles. | chimpeon.com/support/profiles |
| Troubleshooting | If you've encountered a bug or you think something isn't working quite right then Troubleshooting is where you need to go. | chimpeon.com/support/troubleshooting |
| Discord | There are many users who lurk within our Discord channel that may be able to point you in the right direction if you ask nicely. | discord.gg/2bBvQQq |
| Contact Us | If all else fails you can contact us for some one-to-one help but remember, the more time we spend resolving your problem the less time we have for adding new features! USE THE RESOURCES LISTED ABOVE FIRST! | chimpeon.com#contact |
You have been sent an email to reset your password.
If you can't find it, check your junk or spam folder.